
先日、原付二種スクーターのアドレス125(DT11A)のドライブVベルトとウエイトローラーを交換しました。
走行距離約46000kmにしてどちらも初の交換となります。
今回はその交換の模様をお伝えします。

小石健と申します。YouTubeチャンネルはこちら。
クラッチカバーを外す
今回の内容はYouTubeに動画もアップしているので、よければこちらもご覧ください。
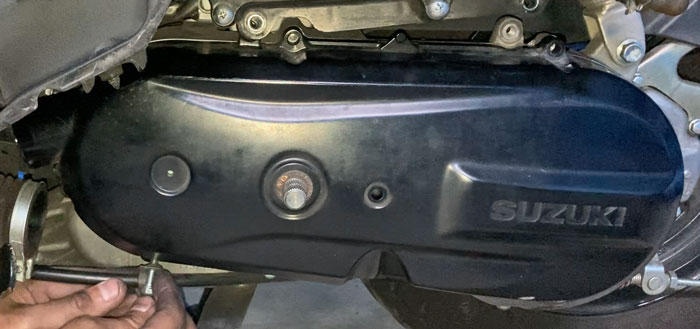
最初にクラッチカバーを取り外すのですが、それには周りの干渉物を取り除ける必要があります。
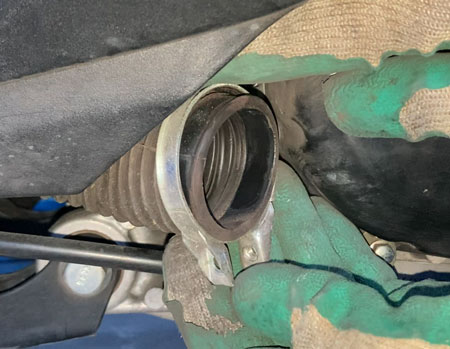
まずプラスドライバーでネジを外してダクトを取り外します。
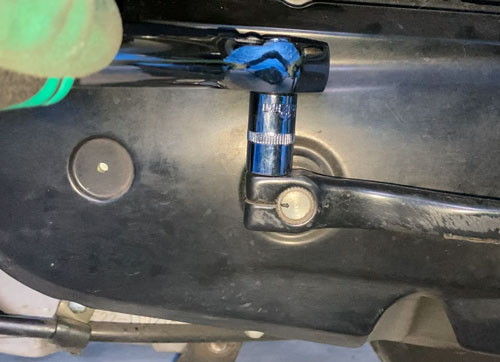
次にエアクリーナボックス下のボルト(10mm)2本を外します。
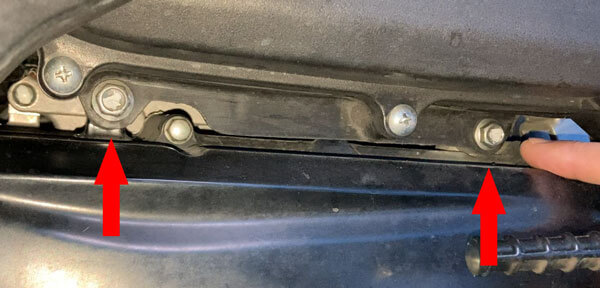
普通のソケットレンチでは届かないため、私はこのT型ハンドルを使いました。

ちなみにソケットレンチセットは今回も下のものを使用しています。

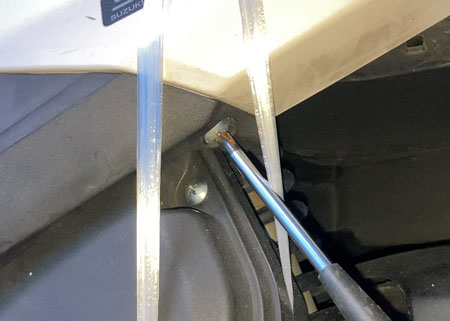
ヒモをドレンプラグの辺りに掛けてエアクリーナボックスを持ち上げたら、キャリアバーに縛りつけます。
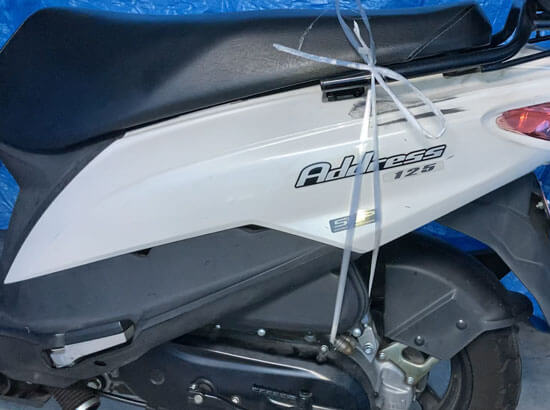
これでボックスが干渉しません。
キックスタータレバーのボルト(12mm)を外してレバーを手で取り外します。
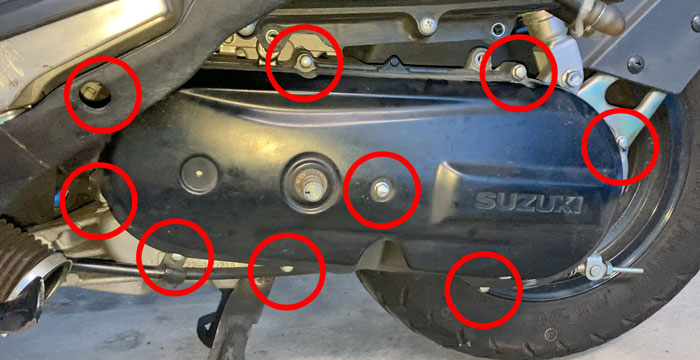
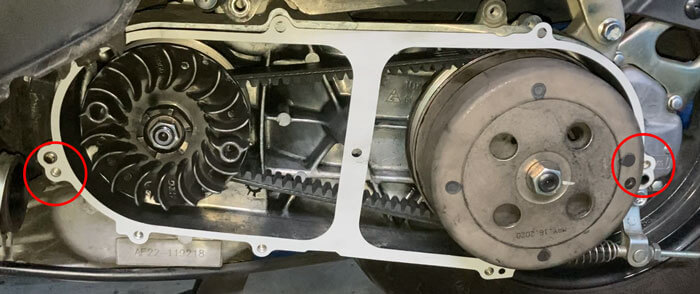
クラッチカバーのボルト(8mm)9本を外します。
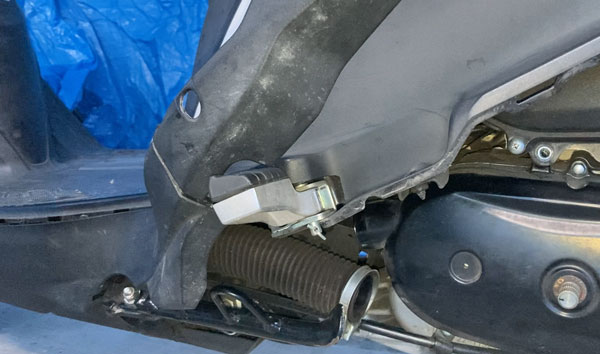
しかし左上のネジはアンダーカバーの穴の向こうにあり、私のT型ハンドルではつっかえて届きません。
というかソケットが通らない…
そこでネジを外してアンダーカバーを取り外します。
タンデムバーの上にアンダーカバーを載せておけば干渉せずに済みます。
変形しそうですが自己責任で…
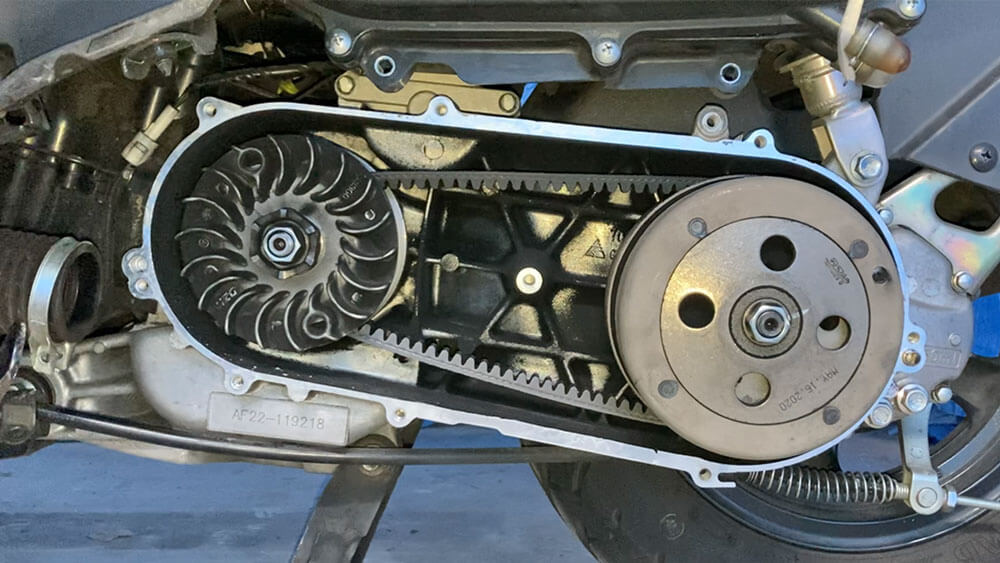
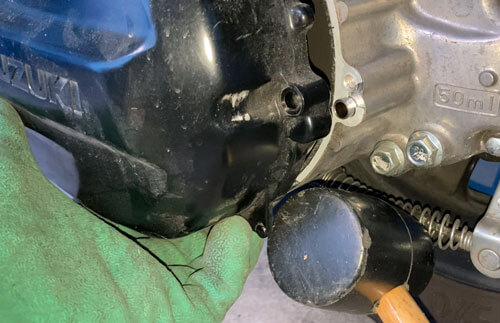
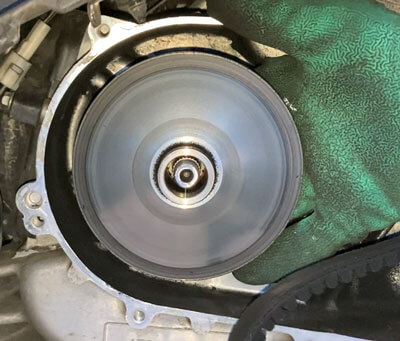
ボルトを外したら、クラッチカバーの端をゴムハンマーで叩きながら取り外します。
クラッチカバーを掃除する
Vベルトのカスなのか、クラッチカバー内は黒く汚れていました。
ガスケットをはがそうとしたものの、こびりついて途中で切れてしまいます。
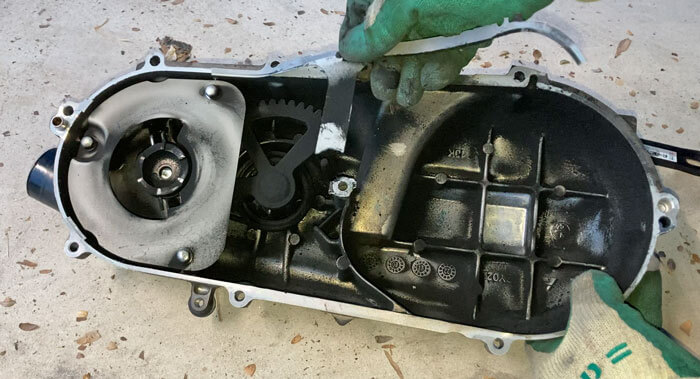
46000kmをノーメンテで走ったツケです。
ヘラやパーツクリーナー・ピカール金属みがき・シールはがし・除光液を使っても完全には剥がれません。
結局カッターで無理やり削ぎ落としましたが、やはりクラッチカバーに傷がついてしまいました。
黒いカスはエアダスターとハケで払いました。

エアダスターは初めて使いましたが、けっこう臭いがきつい。
その他色々な薬品を嗅いだせいもあって、このあと気持ち悪くなってしまいました。
換気にご注意を…
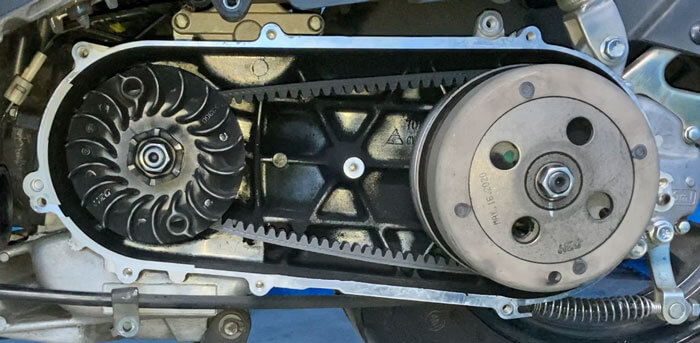
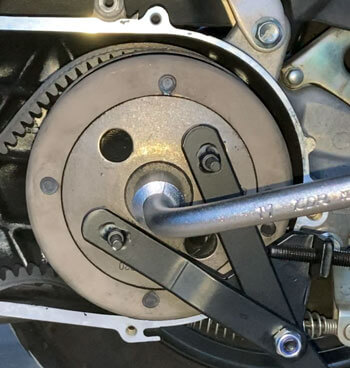
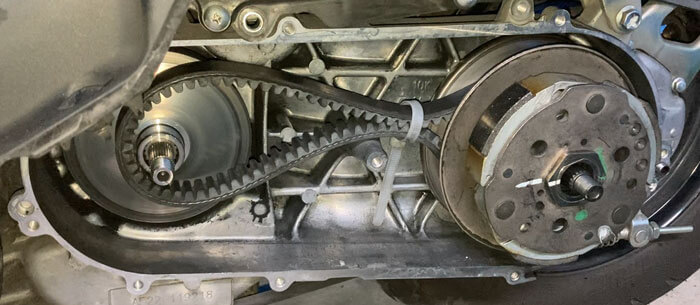
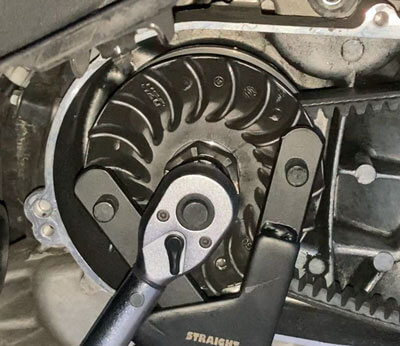
ムーバブルドライブフェイスを外す
フィクストドライブフェイスをユニバーサルホルダーで固定して、ナットを17mmのレンチで外します。
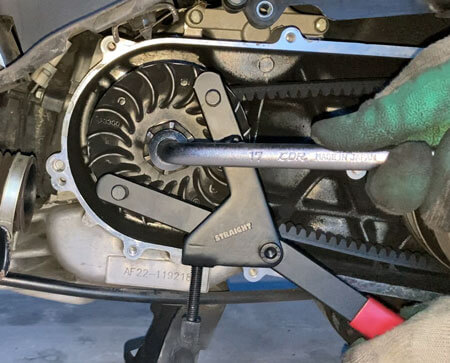

このナットは非常に固く力が要るので、私はソケットと柄が一体のレンチを使いました。

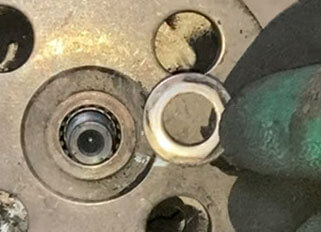
ウェーブワッシャを外します。
これは微妙に湾曲していて、テーパ面(盛り上がった方)が外側となります。
続いてキックスタータとスペーサとフィクストドライブフェイスを外します。
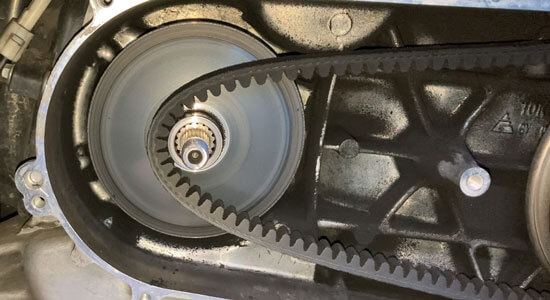
Vベルトをクランクシャフトから外します。
スペーサとムーバブルドライブフェイスとムーバブルドライブプレートを一体で外します。
裏を手でおさえるとバラバラになりません。
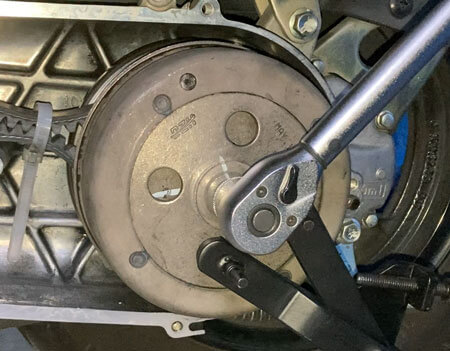
Vベルトを外す
クラッチホイールをユニバーサルホルダーで固定して、ナットを17mmのレンチで外します。
ウェーブワッシャを外します。
クラッチホイールを外します。
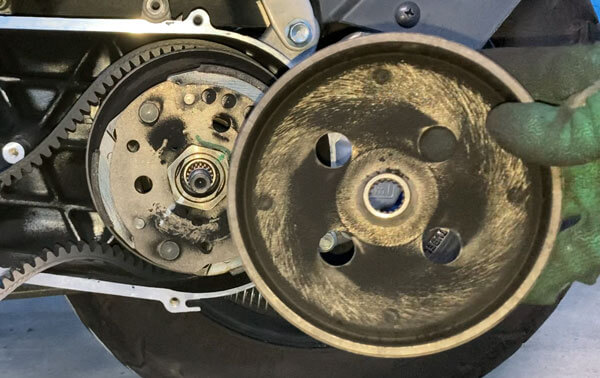
最後にムーバブルドリブンフェイスアッセンブリとVベルトを一緒に取り外します。
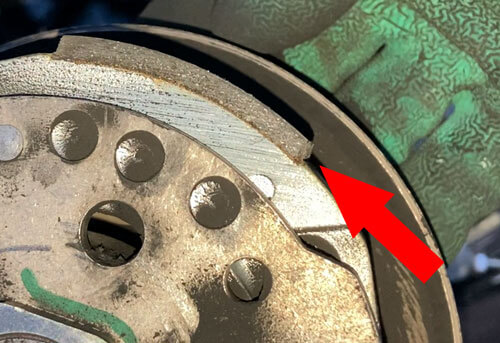
ちなみにアドレス125(DT11A)のクラッチシューの厚さの使用限度は2mmです。
ウエイトローラーを取り付ける
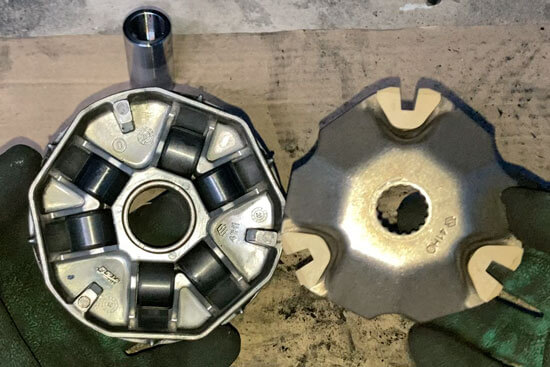
ムーバブルドライブフェイスのスペーサとムーバブルドライブプレートを取り外します。
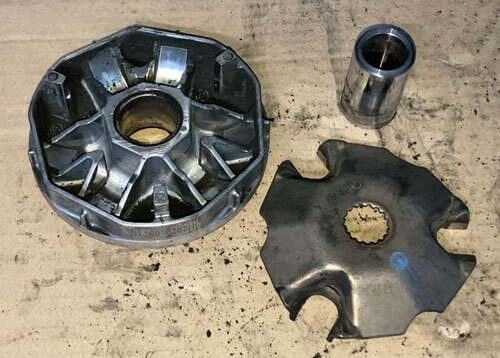
私は上図の3つをパーツクリーナーやピカール金属みがきで掃除しました。

ムーバブルドライブプレートに新しいダンパ(3個)を取り付けます。
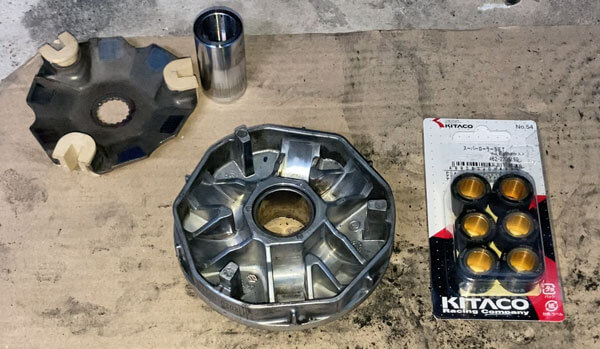
ダンパは純正品を購入しました。

ウエイトローラーはキタコの16gの6個セットを購入。

下図左が打刻面(金属面が少ない)、右がその反対側(金属面が多い)です。
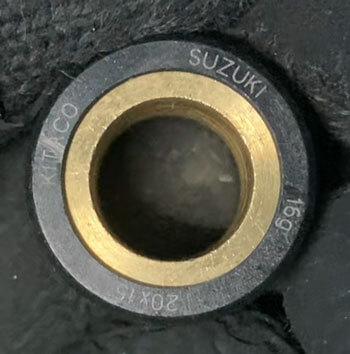
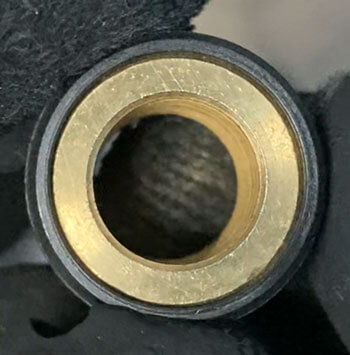
ムーバブルドライブフェイスに取り付ける際は「打刻面が左側」とおぼえておくと簡単かと思います。
ダンパとローラーを取り付けたら、ムーバブルドライブフェイスにムーバブルドライブプレートとスペーサを取り付けます。
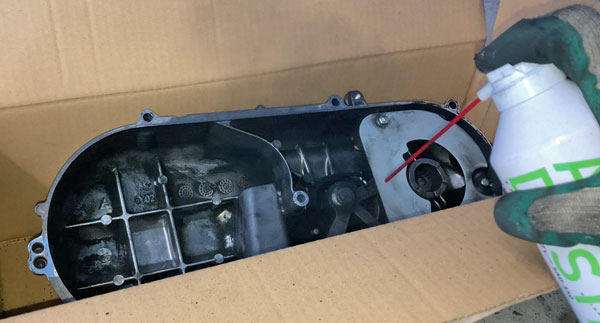
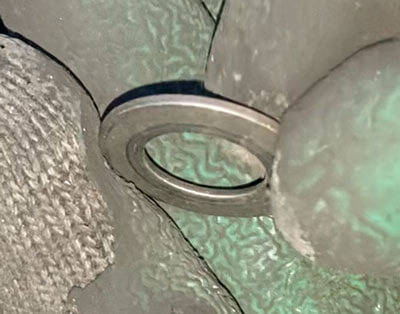
これらをシャフトに取り付ける前に、クラッチカバー内を掃除します。
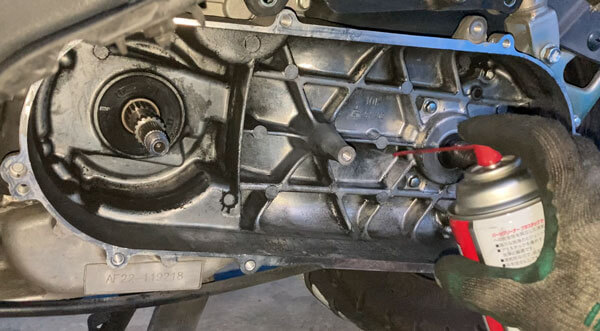
パーツクリーナーはシャフト根元のオイルシール以外の金属部分だけに使いました。

ムーバブルドライブフェイスとムーバブルドライブプレートとスペーサを一体で取り付けます。
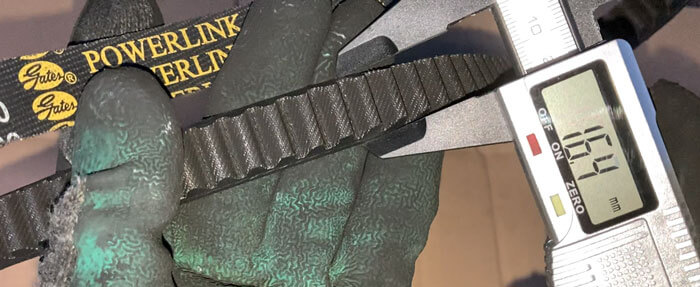
Vベルトの状態の比較
外したVベルトに甚大なダメージはありませんが、幅が16.4mmほどでした。
新しいVベルトは純正品を購入しました。

新品の幅は約18.5mm。
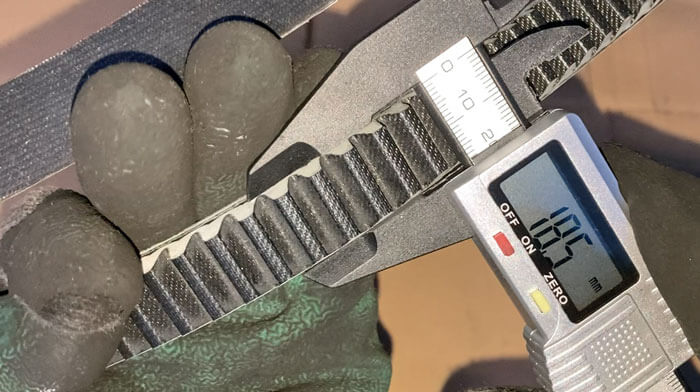
両者を持って見比べるとその差は歴然です。走るほど幅が削られるようです。
よく46000kmもってくれました。
Vベルトを取り付ける
掃除したドリブンフェイスアッセンブリに新しいVベルトを取り付けます。
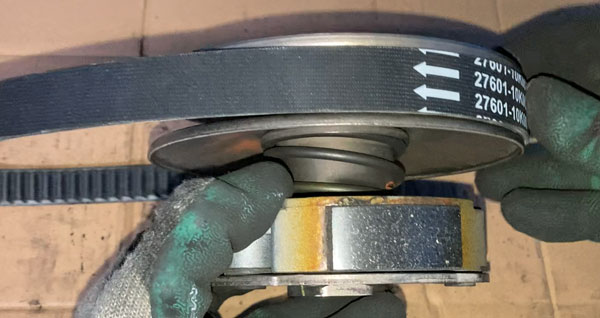
上図のように矢印をエンジン回転方向に向けます。
しかしこのままではNGで、ムーバブルドリブンフェイスとクラッチシューを手で握り込んで取り付け部分の幅を広げる必要があります。
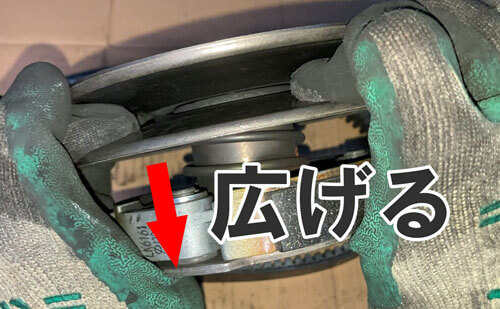
私の場合、ノーメンテのせいか固くて苦労しましたが、とにかくムーバブルドリブンフェイスのできるだけ奥にVベルトを取り付けます。
そのあとVベルトが広がらないよう、中央部を結束バンドで縛りました。
これら一体を取り付けます。
これにクラッチホイールとウェーブワッシャを取り付け、ナット(17mm)を55N・mで締め付けます。

結束バンドを外して、Vベルトを掛けた状態でフィクストドライブフェイスとスペーサ・キックスタータ・ウェーブワッシャを取り付けます。
クラッチホイール同様、ナット(17mm)を55N・mで締め付けます。
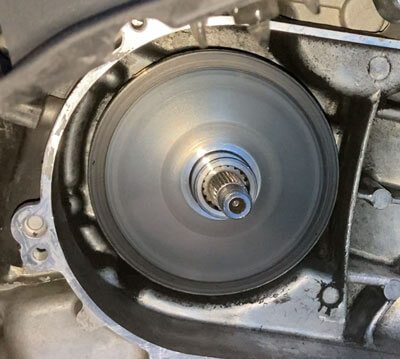
以上を取り付けたら、ムーバブルドリブンフェイスが同時に回転するまでフィクストドライブフェイスを回してVベルトをなじませます。
Vベルトの動きの比較
Vベルト交換前後の比較です。
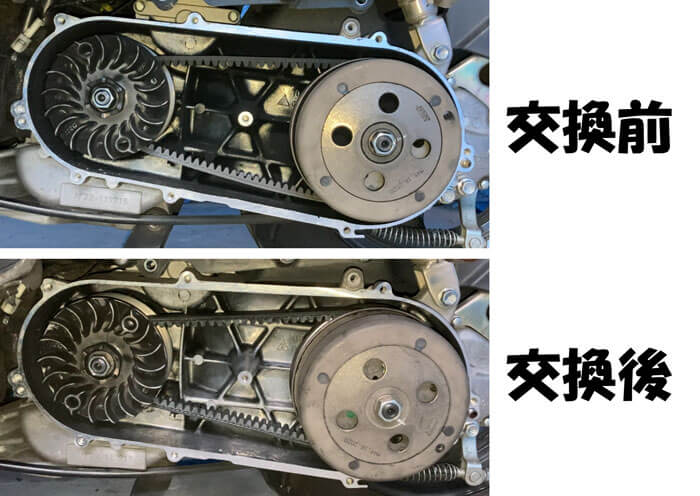
各パーツは問題なく取り付けることができました。
新品のVベルトは張りがあります。
エンジンを作動させると、以前のVベルトは上下のブレが激しいのに対して、交換後はそれが見受けられません。
張りも幅も充分なので、ムーバブルドリブンフェイスの回転も速くなりました。
クラッチカバー他を取り付ける
クラッチカバー両端のノックピンにガスケットを掛けます。
私はガスケットも純正品を購入しました。

ボルトの穴を合わせてクラッチカバーを取り付けます。
ボルト(8mm)9本を取り付け、10N・mで締めます。
私の場合、前述のT型ハンドルはエクステンションバーにもなるので、トルクレンチに接続して締めました。
あとは、ダクト・キックスタータレバー・エアクリーナボックス・アンダーカバーを取り付けて作業完了です。
キックスタータレバーのボルト(12mm)は23N・m、エアクリーナボックスの下のボルト(10mm)は10N・mで締めます。
とにかく疲れました…
走行は今のところ問題ありません。
掃除に手間どってしまいましたが、以降のメンテナンスやパーツ交換の意識が高まるので一度経験するのもいいかと思いました。
しかし予想以上に力作業で、また失敗すると取り返しのつかないことになります。
自身で作業する場合は、その辺りのリスクも考慮して自己責任で行う必要があります。
コメント