
私はデスクトップパソコンを購入して8年後に初めてデュアルディスプレイにしました。
今回はデュアルディスプレイの接続と設定の方法をお伝えします。
初心者同志のご参考になれば幸いです。

小石健と申します。YouTubeチャンネルはこちら。
必要な物
今回の内容についてはYouTubeに動画もアップしているので、よければこちらもご覧ください。
対象はグラフィックボード搭載のデスクトップパソコン(Windows10)となります。
ちなみに、パソコンの映像などを映す装置は「ディスプレイ」と「モニター」の2つの用語がありますが、細かな違いは調べても私にはよく分かりませんでした。
よって以下は「ディスプレイ設定」や「モニターアーム」というように、適宜使い分けることにします。
意味は同じ…はず。
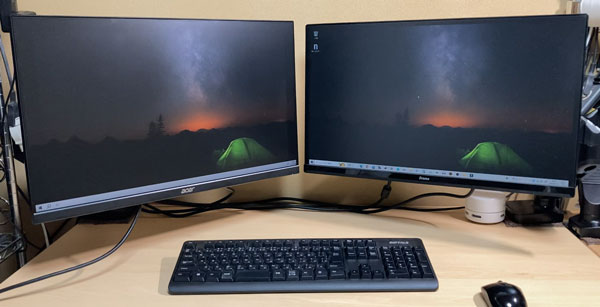
私が購入した2台目のディスプレイはこちら。

Acer(エイサー)のゲーミングモニターで23.8インチです。
以前の記事でも述べましたが、YouTubeでゲームチャンネルを始めるために購入しました。

一方のディスプレイでゲーム画面を、もう一方でキャプチャーソフトの設定画面を映すのが目的です。
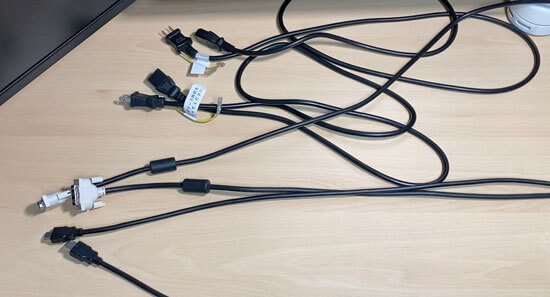
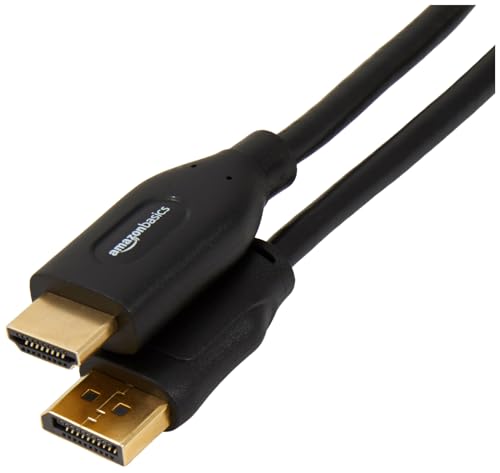
他に必要なものは、各ディスプレイの電源ケーブルと映像ケーブルとなります。
PCとディスプレイを接続
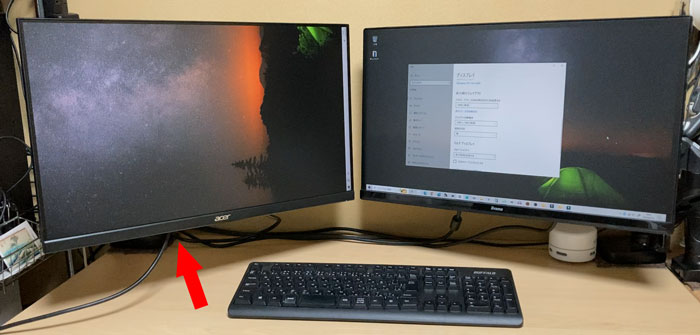
まず各ディスプレイに電源ケーブルを接続します。
次にパソコンとディスプレイを映像ケーブルで接続します。
すべての電源はオフにしておきます。
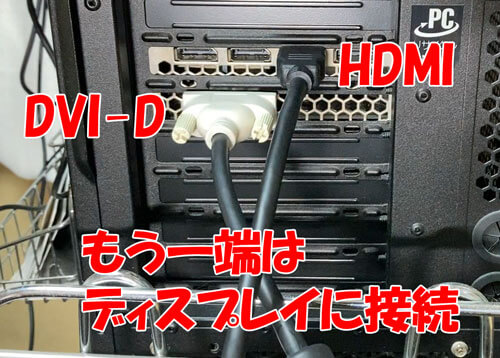
デスクトップパソコンは、マザーボード側ではなくグラフィックボード側(下図矢印)にケーブルを挿します。
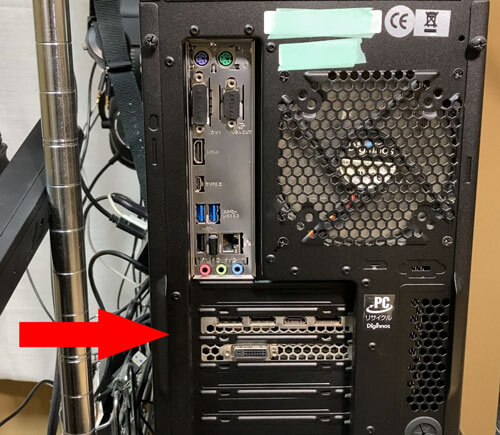
この場合は以下の端子に対応しています。
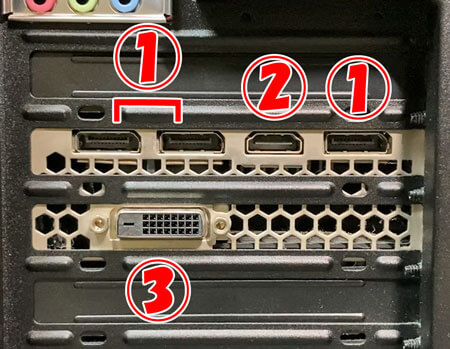
- ディスプレイポート×3
- HDMI×1
- DVI-D×1
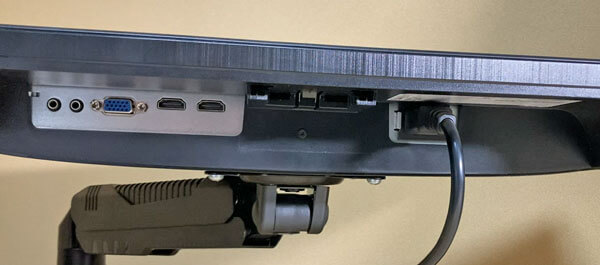
私の古い方のディスプレイは以下のとおり。
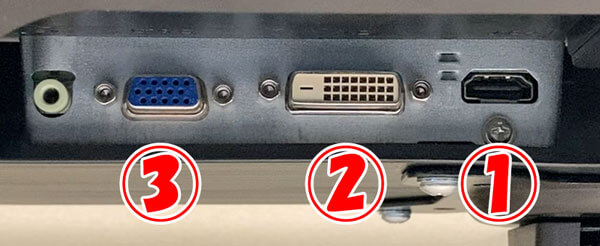
- HDMI×1
- DVI-D×1
- D-Sub(VGA)×1
新たに購入したディスプレイは以下のとおり。
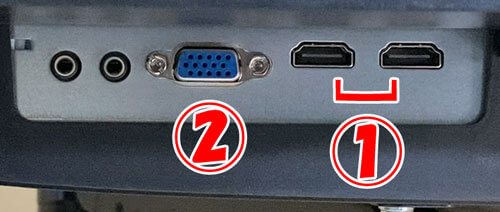
- HDMI×2
- D-Sub(VGA)×1
D-Sub(VGA)はアナログなので、それ以外のデジタルの端子を使います。
パソコンとディスプレイは違う端子でも、変換ケーブルや変換アダプターを使えば接続することができます。
その場合は、入出力の端子を間違えないよう注意が必要です。
私のパソコンはHDMIをひとつしか接続できないため、新しい方のディスプレイにはHDMIで接続、古い方のディスプレイにはとりあえずDVI-Dで接続しました。
ディスプレイポートが使えない…
接続したらパソコンとディスプレイの電源を入れます。
私はパソコンの電源を入れたまま接続したせいか、右側のディスプレイが映りませんでした。
デュアルディスプレイの設定
ディスプレイ設定
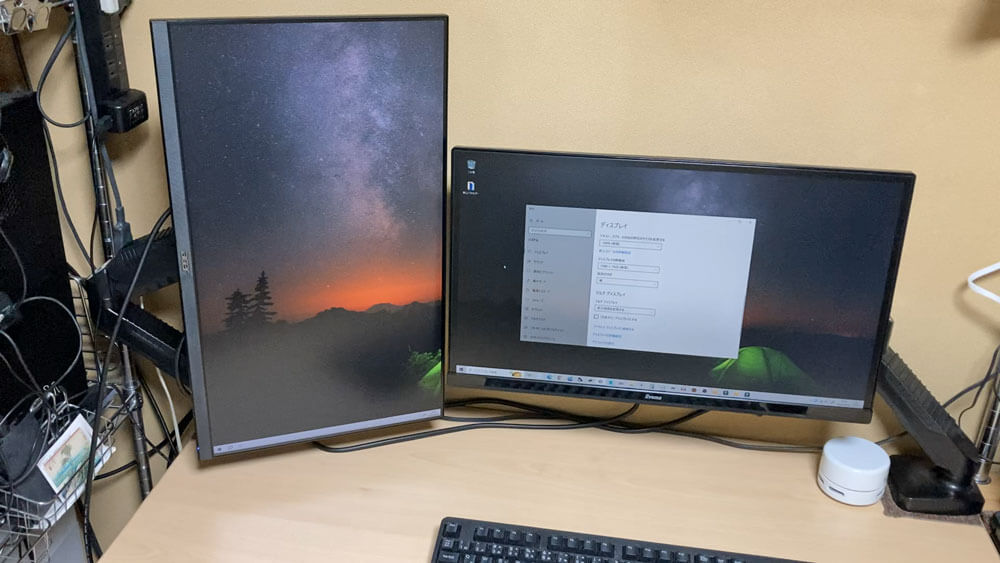
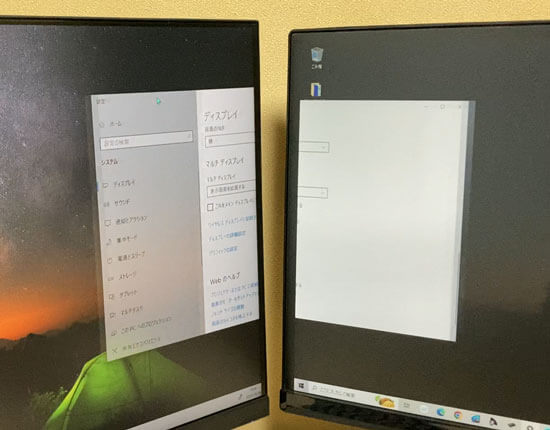
デスクトップ画面で右クリックして「ディスプレイ設定」をクリックします。

この「ディスプレイ」画面にて見栄えを設定していきます。
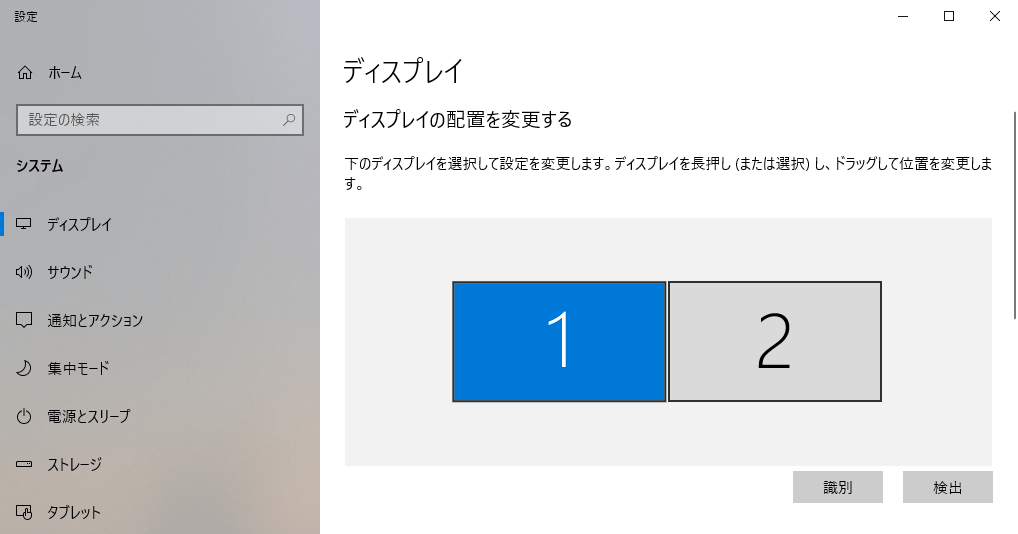
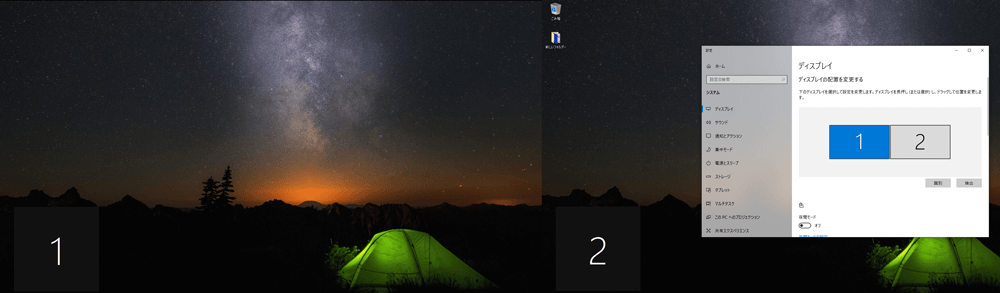
「ディスプレイの配置を変更する」に「1」と「2」と2台のディスプレイが表示されています。
その下の「識別」をクリックすると、対応の数字がディスプレイに表示されます。
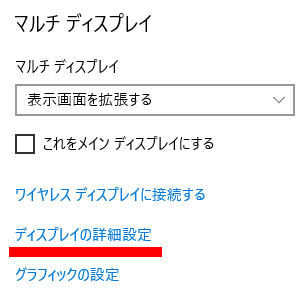
表示画面を拡張する
その下の「マルチディスプレイ」で画面の表示の仕方を設定します。
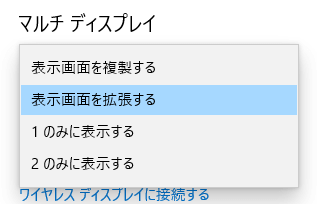
どちらも同じ画面にする場合は「表示画面を複製する」を選択します。
私は「表示画面を拡張する」にしました。
こうすることでそれぞれ別の画面が表示されます。
メインディスプレイを決める
次にメインのディスプレイを決めます。
さきほどの「ディスプレイの配置を変更する」にて、メインにしたい方の番号のディスプレイをクリックして、「マルチディスプレイ」の「これをメインディスプレイにする」にチェックを入れます。
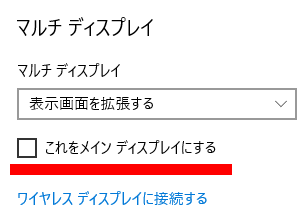
私は2番(右側)のディスプレイをメインにしました。
1番(左側)をサブディスプレイとして扱うことにします。
画面を縦向きにする
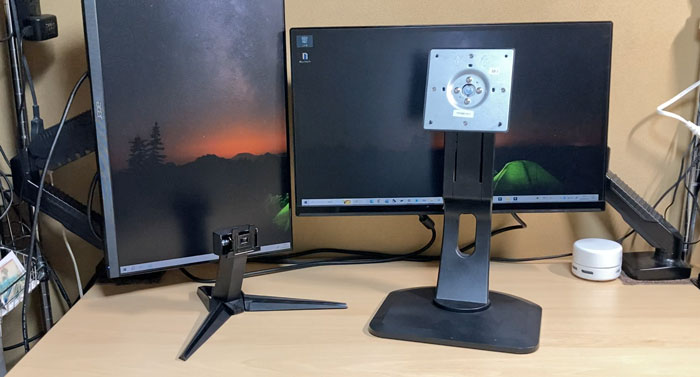
また私の場合、スペースの都合上、左側のディスプレイは縦向きにします。
縦向きにしたいディスプレイ(1番)をクリックして、「拡大縮小とレイアウト」の「画面の向き」で「縦」を選択します。
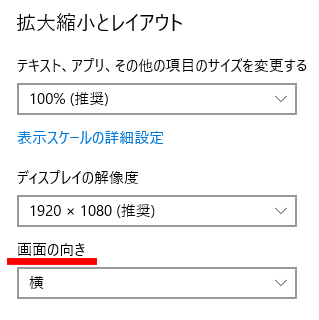
画面の表示が縦に変わりました。
ディスプレイを90°回転させます。
縦向きにしてもカーソルやウィンドウの移動は変わらず行うことができます。
ディスプレイのスタンドですが、これもスペースの都合によりアームに変えました。

その場合はディスプレイが「VESA規格」に対応している必要があります。
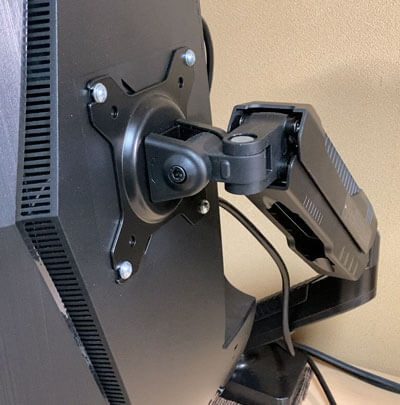
これなら回転できないスタンドでも自由に向きを変えることができます。
その他、ディスプレイをドラッグ&ドロップして上下に配置したり左右逆にしたりすることもできます。

リフレッシュレートの変更
レイアウトが終わったら、リフレッシュレートを変更します。
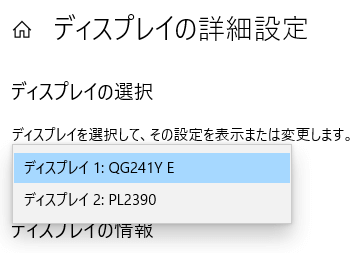
「マルチディスプレイ」の「ディスプレイの詳細設定」をクリックします。
変更したいディスプレイを選択します。
リフレッシュレートを変更します。
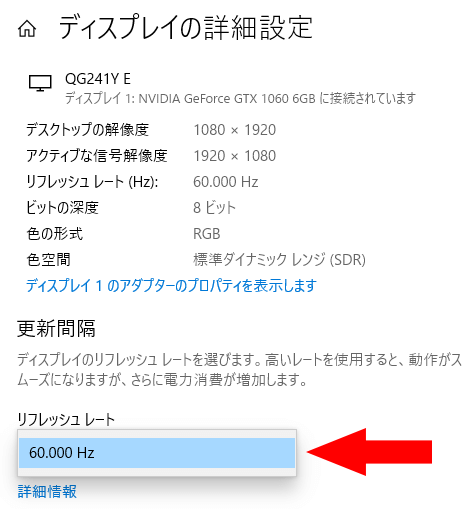
しかし…
このディスプレイは100Hz対応ですが、60Hzしか選択できません。
おそらく縦向きにしたことで、解像度が変わったからかもしれません。
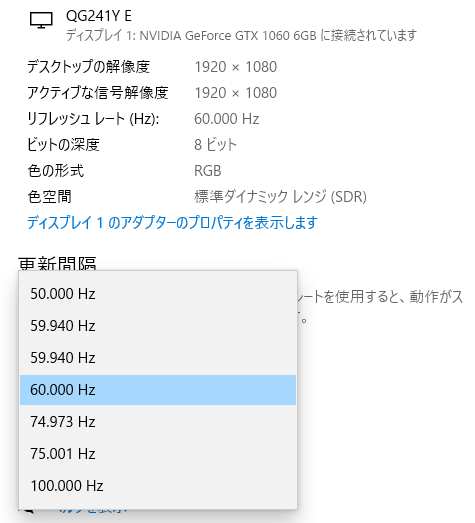
ちなみに私のメインディスプレイは横向きでも60Hzしか選択できないので、結局2台を60Hzで統一することにしました(現状そうする他ない)。
デュアルディスプレイにする際は、この辺りも注意が必要です。
タスクバーの設定
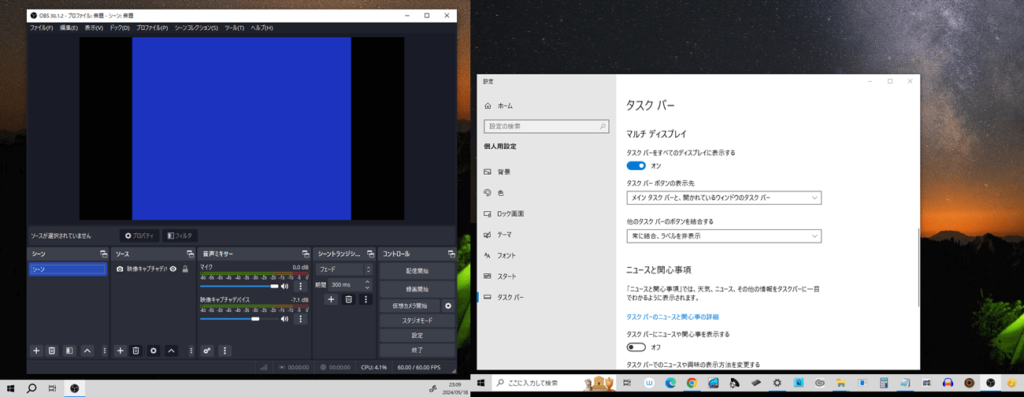
私は最後にタスクバーを以下のように設定しました。
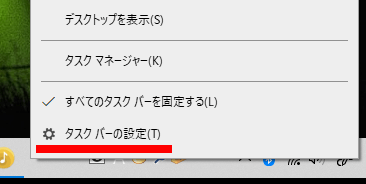
タスクバーの空白部分で右クリックして「タスクバーの設定」をクリックします。
「マルチディスプレイ」の「タスクバーをすべてのディスプレイに表示する」をオンします。
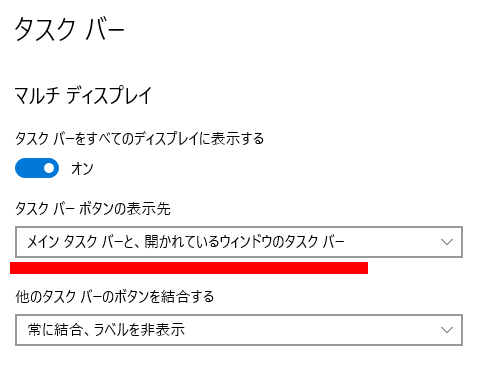
その下の「タスクバーボタンの表示先」で「メインタスクバーと、開かれているウィンドウのタスクバー」を選択します。
すると、両方のディスプレイにタスクバーが表示され、サブディスプレイの方には開かれているウィンドウのアイコンが表示されます。
これでサブディスプレイで何を開いているのかが分かりやすくなります。
以上で基本的な設定は完了です。
いまさらですが、デュアルディスプレイにすることで、やはり効率の良さと利便性を実感することができました。
特にゲームの実況や配信をする人にとって、その効果は大きいかと思います。
コメント