前回は、やよいの青色申告オンラインを使った電子申告について解説しました。
「これで確定申告は完了」と思いきや、私はe-Taxで帳票(確定申告書類)をダウンロードすることができませんでした。
どうもe-Taxを利用する環境が整っていなかったようです。
そこで今回は、e-Taxの環境を設定して帳票をダウンロードする手順をお伝えします。
![](https://koishiken.com/wp-content/uploads/2022/07/koishiken-150x150.jpg)
小石健と申します。YouTubeチャンネルはこちら。
e-Taxの「環境チェック結果」を見直す
以前にも触れましたが、私の場合、e-Tax(WEB版)にログインしようとすると「環境チェック結果」が表示されます。
![e-Taxの環境チェック結果](https://koishiken.com/wp-content/uploads/2024/03/e-tax-environment-check-results.png)
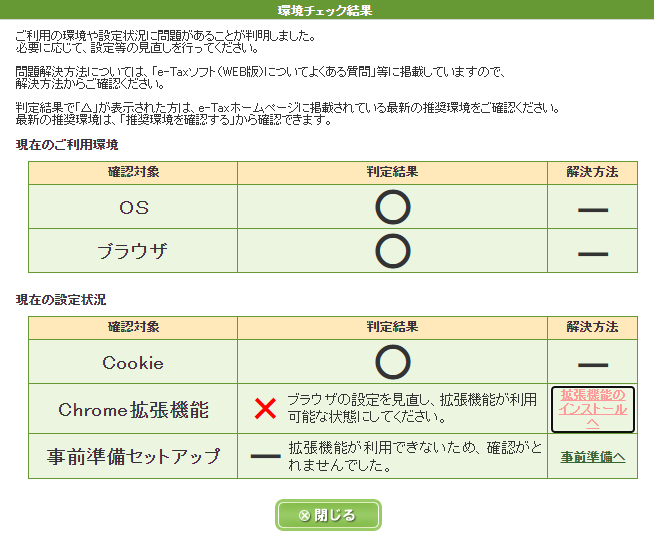
利用者識別番号の取得や電子申告をするのはこの状態でも可能でしたが、帳票のダウンロードはできません。
「Chrome拡張機能」と「事前準備セットアップ」の設定ができていないからだと思われます。
![](https://koishiken.com/wp-content/uploads/2022/07/koishiken-150x150.jpg)
よって、ここではこの2つを設定します。
なお「WindowsパソコンにてブラウザはGoogle Chromeを使用」という環境のもとで行います。
Chrome拡張機能をインストールする
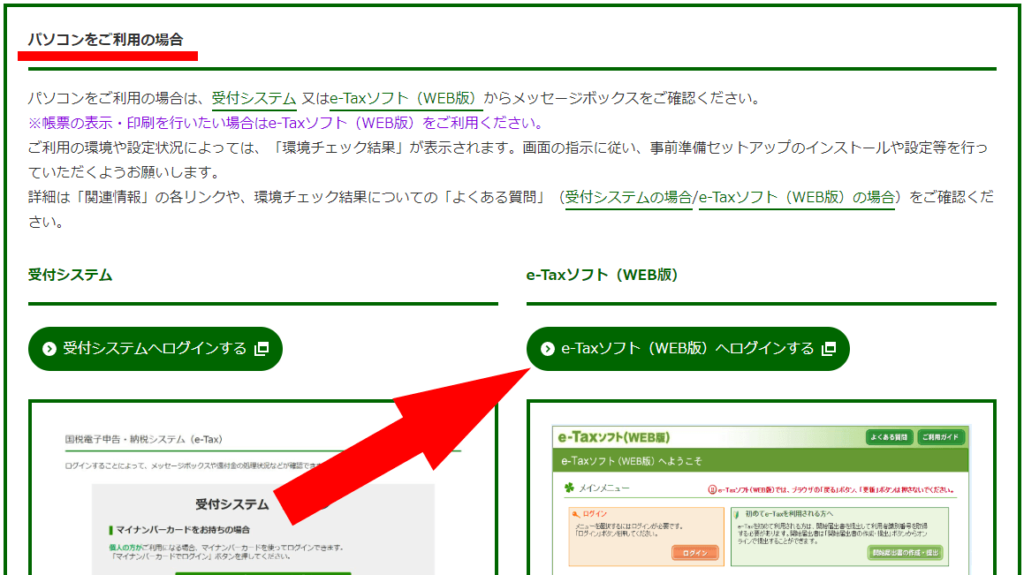
まず、e-Taxのサイトを開き「ログイン」をクリックします。
![e-Taxのログインボタン](https://koishiken.com/wp-content/uploads/2024/03/e-tax-login-button.png)
「パソコンをご利用の場合」の「e-Taxソフト(WEB版)へログインする」をクリックします。
![e-TaxのWEB版のログインボタン](https://koishiken.com/wp-content/uploads/2024/03/e-tax-web-version-login-button-1024x575.png)
前述のように、「環境チェック結果」にて私はこのような判定結果が表示されました。
![e-Taxの環境チェック結果](https://koishiken.com/wp-content/uploads/2024/03/e-tax-environment-check-results.png)
まず「Chrome拡張機能」の「拡張機能のインストールへ」をクリックします。
「e-Tax AP」の画面が新たに開きます。
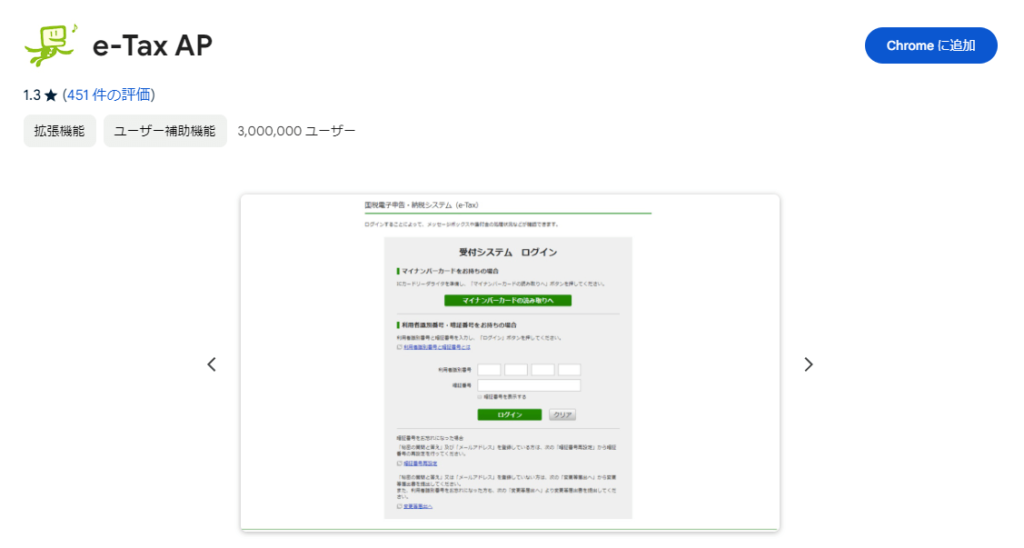
![e-Tax AP](https://koishiken.com/wp-content/uploads/2024/03/e-tax-ap-1024x548.png)
![](https://koishiken.com/wp-content/uploads/2022/07/koishiken-150x150.jpg)
ユーザーの評価は芳しくありませんが…
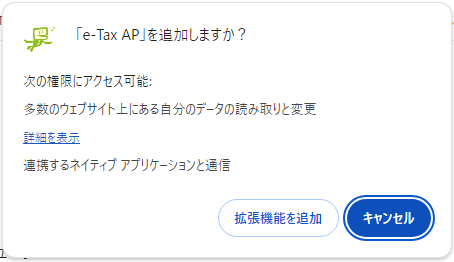
画面右上の「Chromeに追加」をクリックします。
「e-Tax APを追加しますか?」の画面で「拡張機能を追加」をクリックします。
![e-Tax APを追加する画面](https://koishiken.com/wp-content/uploads/2024/03/screen-for-adding-e-tax-ap.png)
画面右上に「e-Tax APがchromeに追加されました」と表示されました。
![e-Tax APがchromeに追加された](https://koishiken.com/wp-content/uploads/2024/03/e-tax-ap-added-to-chrome.png)
画面右上の「拡張機能」のアイコンをクリックします。
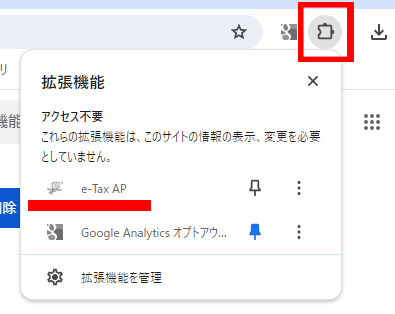
![拡張機能に追加されたe-Tax AP](https://koishiken.com/wp-content/uploads/2024/03/e-tax-ap-added-to-extensions.png)
e-Tax APが表示されています。
![](https://koishiken.com/wp-content/uploads/2022/07/koishiken-150x150.jpg)
よく分かりませんが、このまま何もしなくてもいいようです。
再びe-Taxのサイトに戻り、「e-Taxソフト(WEB版)へログインする」をクリックして環境チェック結果を表示させます。
![e-Taxのchrome拡張機能をインストールしたあとの環境チェック結果](https://koishiken.com/wp-content/uploads/2024/03/environment-check-results-after-installing-the-e-tax-chrome-extension.png)
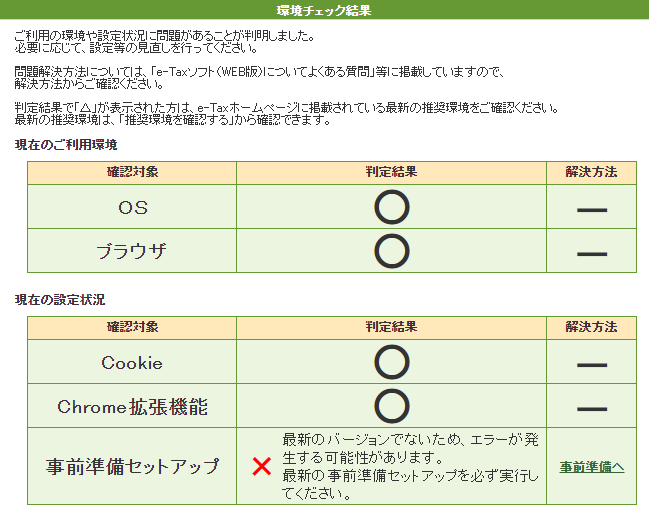
「Chrome拡張機能」の判定結果が「○」になっていて、設定が完了したのが分かります。
事前準備セットアップをする
次に「事前準備セットアップ」を行います。
e-Taxの環境チェック結果の「事前準備へ」をクリックします。
![e-Taxのchrome拡張機能をインストールしたあとの環境チェック結果](https://koishiken.com/wp-content/uploads/2024/03/environment-check-results-after-installing-the-e-tax-chrome-extension.png)
e-Taxの「(4)事前準備セットアップ」の画面が表示されます。
![e-Taxの事前準備セットアップの画面](https://koishiken.com/wp-content/uploads/2024/03/e-tax-advance-preparation-setup-screen-1024x534.png)
![](https://koishiken.com/wp-content/uploads/2022/07/koishiken-150x150.jpg)
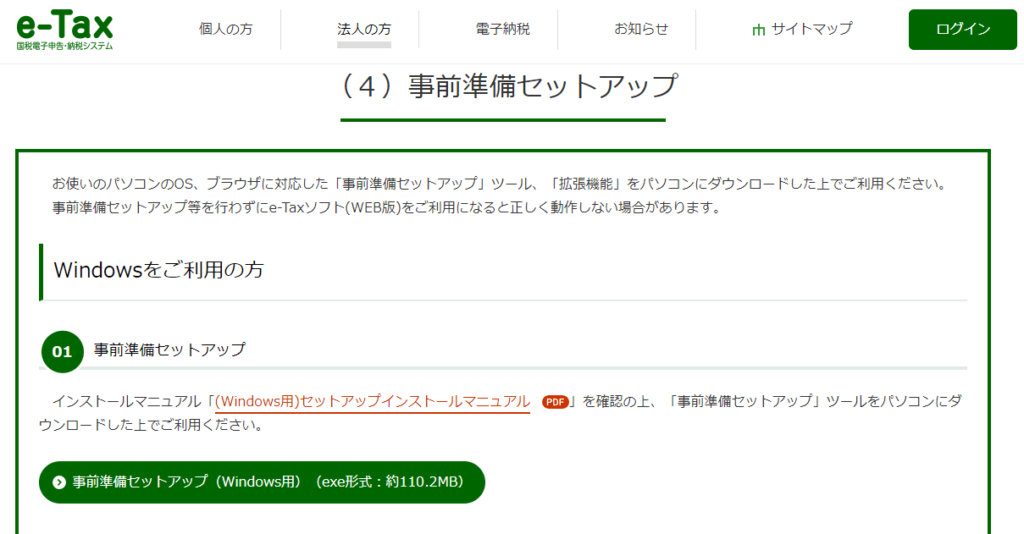
「事前準備セットアップツール」をPCにダウンロードするようです。
「事前準備セットアップ(Windows用)」をクリックします。
少しするとインストーラーがダウンロードされました。
![e-Taxの事前準備セットアップのインストーラー](https://koishiken.com/wp-content/uploads/2024/03/e-tax-preparation-setup-installer.png)
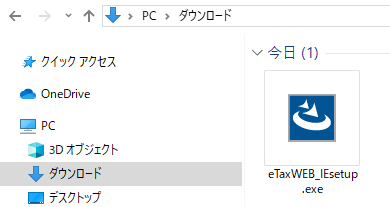
この「eTaxWEB_IEsetup.exe」をダブルクリックします。
全てのブラウザを終了させて「実施済み(次へ)」をクリックします。
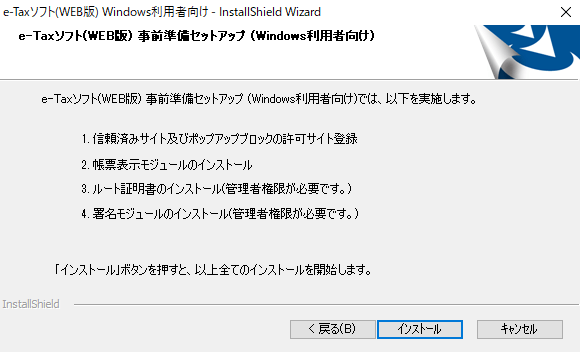
![e-Taxの事前準備セットアップのブラウザ終了確認画面](https://koishiken.com/wp-content/uploads/2024/03/browser-exit-confirmation-screen-for-e-tax-advance-preparation-setup.png)
「インストール」をクリックします。
![e-Taxの事前準備セットアップのインストールボタン](https://koishiken.com/wp-content/uploads/2024/03/install-button-for-e-tax-advance-preparation-setup.png)
続いて「JPKI利用者ソフト」のインストール画面が表示されます。
![e-TaxのJPKI利用者ソフトのインストール画面](https://koishiken.com/wp-content/uploads/2024/03/e-tax-jpki-user-software-installation-screen.png)
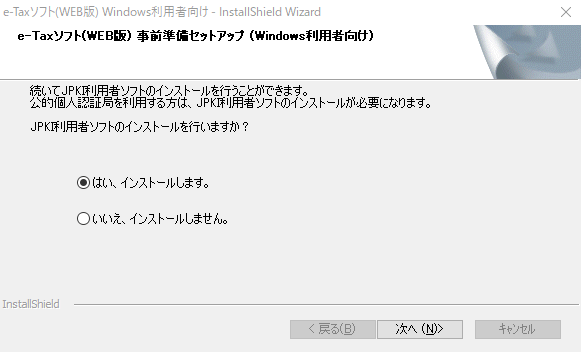
「公的個人認証局」を利用する場合はインストールが必要とのことです。
私は「はい、インストールします」を選択して「次へ」をクリックしました。
「JPKI利用者ソフトが既にインストールされています。上書きインストールしますか?」と表示されました。
![e-TaxのJPKI利用者ソフトのインストール済みの画面](https://koishiken.com/wp-content/uploads/2024/03/installed-screen-of-e-tax-jpki-user-software.png)
![](https://koishiken.com/wp-content/uploads/2022/07/koishiken-150x150.jpg)
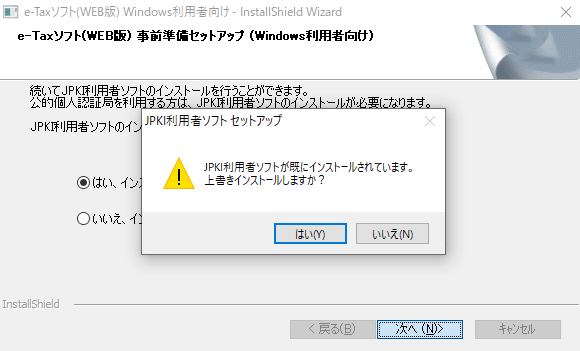
記憶にありませんが、以前にインストールしていたようです。
ここは「いいえ」をクリックします。
「JPKI利用者ソフトはインストールされませんでした」と表示されました。
![e-TaxのJPKI利用者ソフトがインストールされなかった画面](https://koishiken.com/wp-content/uploads/2024/03/screen-where-e-tax-jpki-user-software-was-not-installed.png)
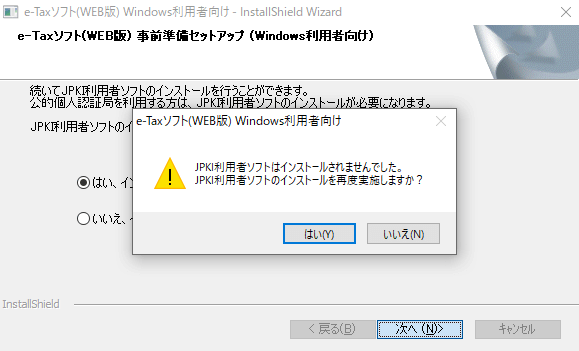
「JPKI利用者ソフトのインストールを再度実施しますか?」は「いいえ」をクリックします。
「e-Taxソフト事前準備セットアップが完了しましたが、JPKI利用者ソフトはインストールされませんでした」とのことです。
![e-Taxの事前準備セットアップの完了画面](https://koishiken.com/wp-content/uploads/2024/03/e-tax-advance-preparation-setup-completion-screen.png)
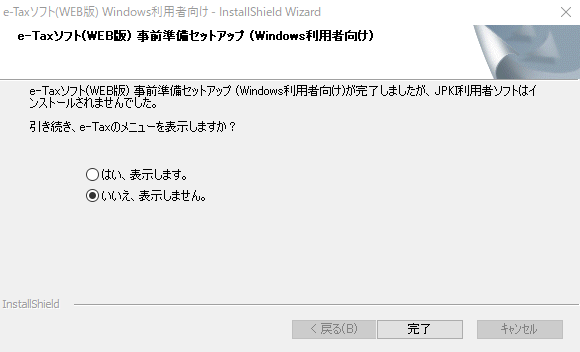
「e-Taxのメニューを表示しますか?」は「いいえ、表示しません」にチェックが入ったまま「完了」をクリックします。
![](https://koishiken.com/wp-content/uploads/2022/07/koishiken-150x150.jpg)
これで事前準備セットアップは完了です。
改めてe-Taxソフト(WEB版)のログイン画面を開くと、環境チェック結果は表示されませんでした。
![e-TaxソフトWEB版のログイン画面](https://koishiken.com/wp-content/uploads/2024/03/e-tax-software-web-version-login-screen.png)
確定申告書類をダウンロードする
これで帳票(確定申告書類)をダウンロードすることができます。
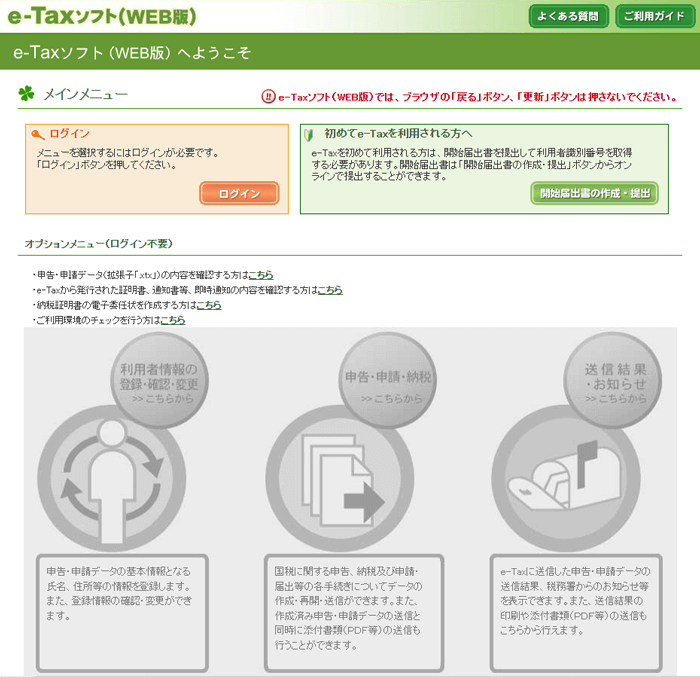
e-Taxソフト(WEB版)にログインし、メッセージボックスを表示させます。
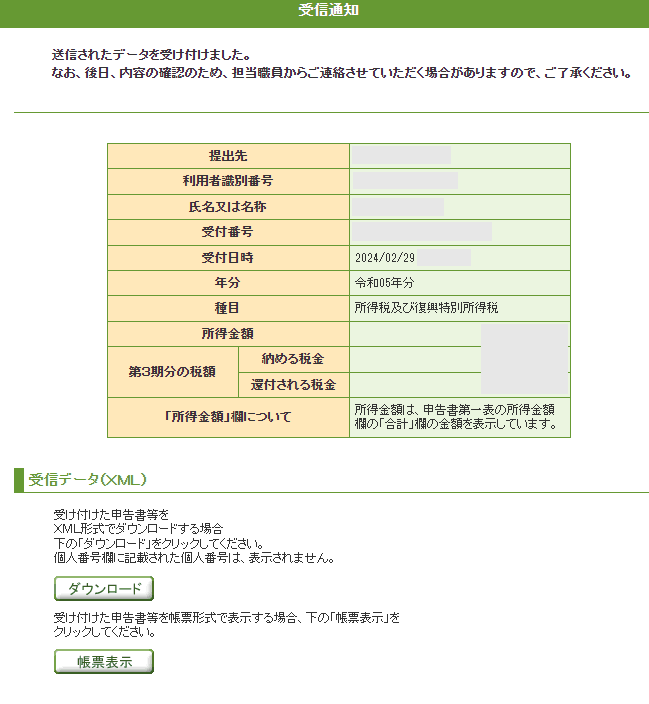
「所得税及び復興特別所得税申告」の受付完了のメッセージを開きます。
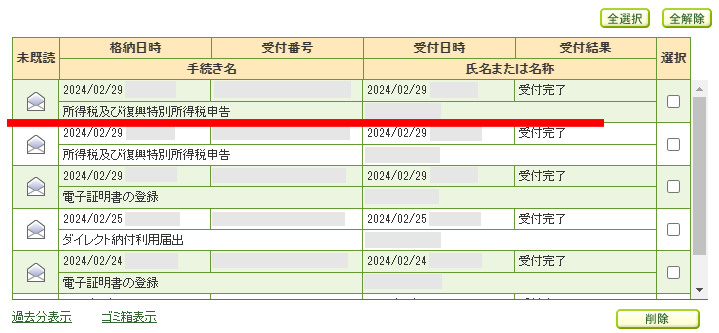
![e-Taxの所得税申告の受け付け完了のメッセージ](https://koishiken.com/wp-content/uploads/2024/03/message-indicating-that-e-tax-income-tax-return-has-been-accepted.png)
「帳票表示」をクリックします。
![e-Taxのメッセージの確定申告書の帳票表示ボタン](https://koishiken.com/wp-content/uploads/2024/03/form-display-button-for-final-tax-return-in-e-tax-message.png)
以前はクリックしても無反応でしたが、「帳票一覧」画面が表示されます。
![e-Taxのダウンロードする申告書の選択画面](https://koishiken.com/wp-content/uploads/2024/03/e-tax-tax-return-selection-screen-to-download.png)
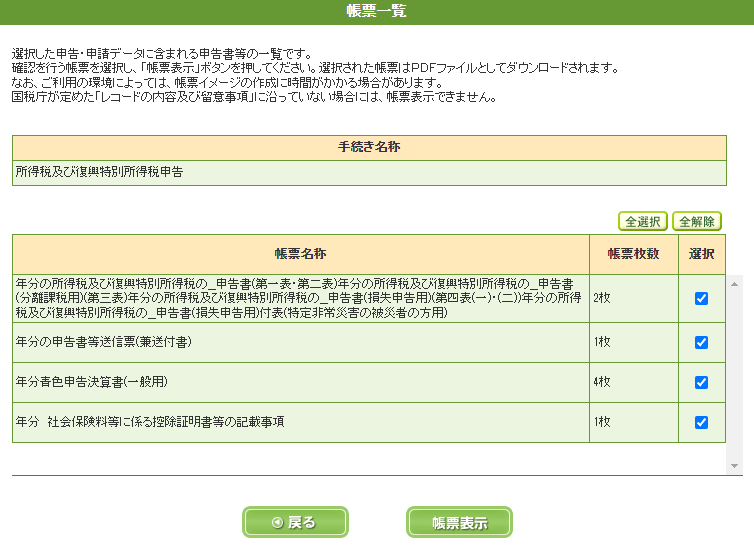
必要な書類(ここではすべて)にチェックを入れ「帳票表示」をクリックします。
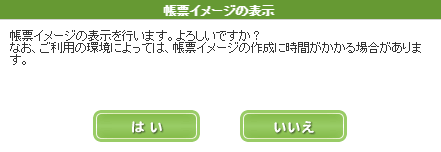
「帳票イメージの表示を行います。よろしいですか?」の画面が表示されるので「はい」をクリックします。
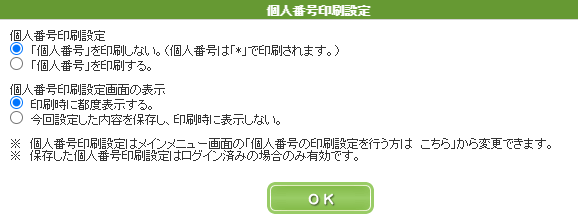
![e-Taxの帳票イメージの表示の確認画面](https://koishiken.com/wp-content/uploads/2024/03/confirmation-screen-for-displaying-e-tax-form-image.png)
「個人番号印刷設定」を選択して「OK」をクリックします。
![e-Taxの個人番号の印刷設定画面](https://koishiken.com/wp-content/uploads/2024/03/e-tax-personal-number-print-setting-screen.png)
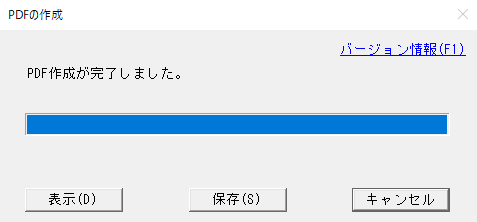
「PDF作成が完了しました」の画面が表示されるので「保存」をクリックします。
![e-TaxのPDFの作成完了画面](https://koishiken.com/wp-content/uploads/2024/03/e-tax-pdf-creation-completion-screen.png)
保存する場所を選択して「保存」をクリックします。
![e-TaxのPDFの保存画面](https://koishiken.com/wp-content/uploads/2024/03/e-tax-pdf-save-screen.png)
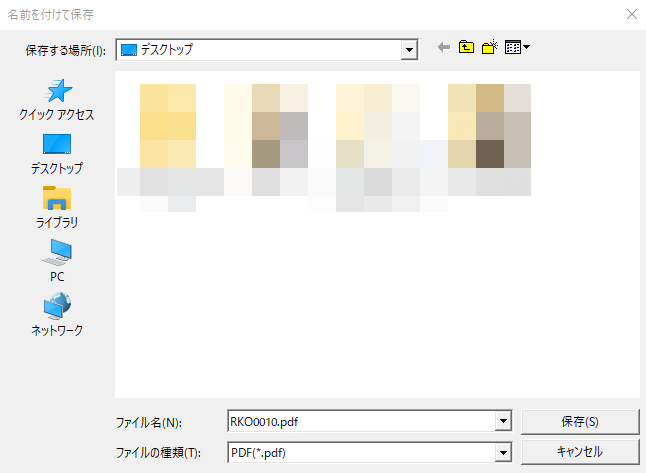
保存したPDFファイルをダブルクリックして開くと書類が表示されます。
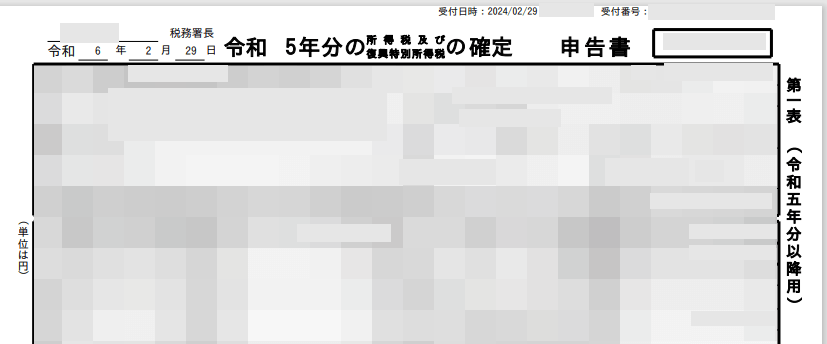
![e-Taxからダウンロードした確定申告書](https://koishiken.com/wp-content/uploads/2024/03/tax-return-downloaded-from-e-tax.png)
![](https://koishiken.com/wp-content/uploads/2022/07/koishiken-150x150.jpg)
これで書類のダウンロードは完了です。
ちなみに、やよいの青色申告オンラインでも確定申告書類をダウンロードすることができます。
![やよいの青色申告オンラインの確定申告のステップ2と3](https://koishiken.com/wp-content/uploads/2024/03/steps-2-and-3-of-yayoi-blue-tax-return-online-tax-return.png)
以上でe-Taxの環境の設定は完了です。
突然の事態に戸惑わないよう、事前にe-Taxの利用環境は整えておいた方がいいかと思います。
【PR】やよいの青色申告オンライン
コメント