
前回は自身のYouTubeチャンネルのプロフとバナーの画像を設定しました。

今回はYouTube Studioの「設定」をします。

小石健と申します。YouTubeチャンネルはこちら。
全般
以下は日本在住の私個人のケースで解説します。
操作はパソコンにて行いました。
まずYouTube Studioを開き、左メニューの「設定」をクリックして設定画面を開きます。
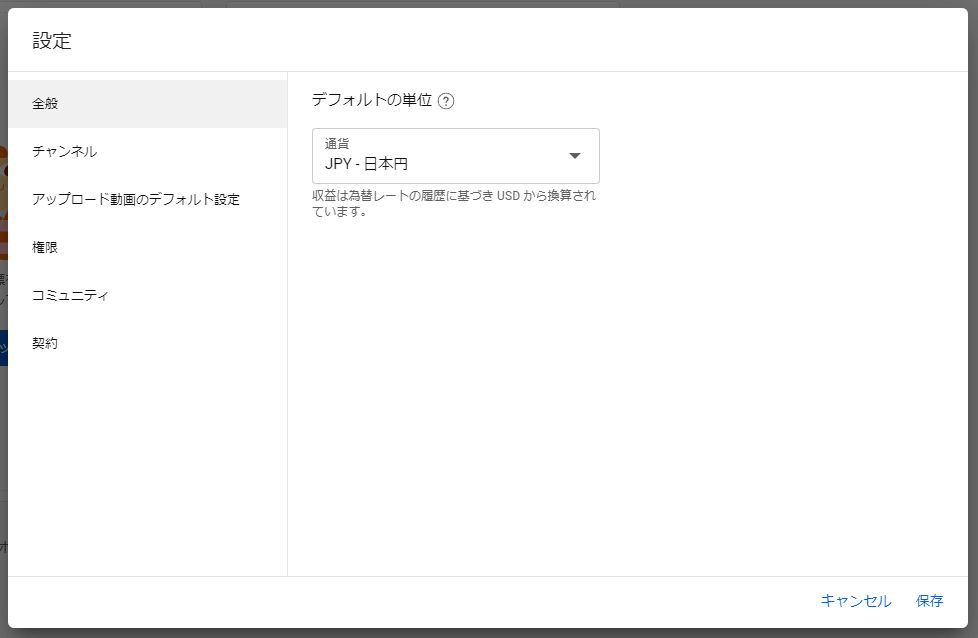
「全般」にて「デフォルトの単位」の通貨を選択します。
私は「JPY – 日本円」を選択しました。
設定を変更するには右下の「保存」をクリックします(以下同じ)。
チャンネル
次に「チャンネル」をクリックします。
基本情報
「基本情報」では、まず「居住国」を選択します。
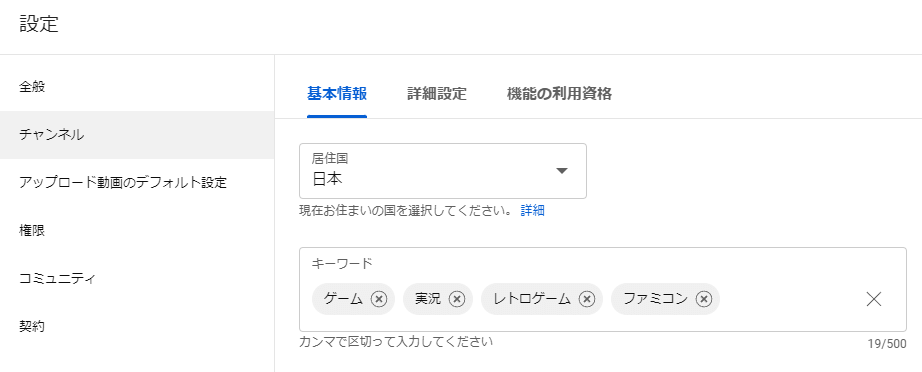
私は「日本」を選択しました。
次に「キーワード」をカンマ(,)で区切って入力します。
「キーワード」とはそのチャンネルのジャンルを示すもので、おすすめや関連動画に表示されやすくなるという効果があるそうです。
私の新チャンネルのジャンルはゲームですが、まだ方向性が固まっていないので、とりあえず上図のように入力しました。
YouTuberのガイドラインにはキーワードの数の規定はありませんが、ある程度どんなチャンネルにしたいか考えている場合は極端に多くなることはないはずです。
詳細設定
「詳細設定」では、最初に「チャンネルを子ども向けとして設定しますか?」という設問があります。
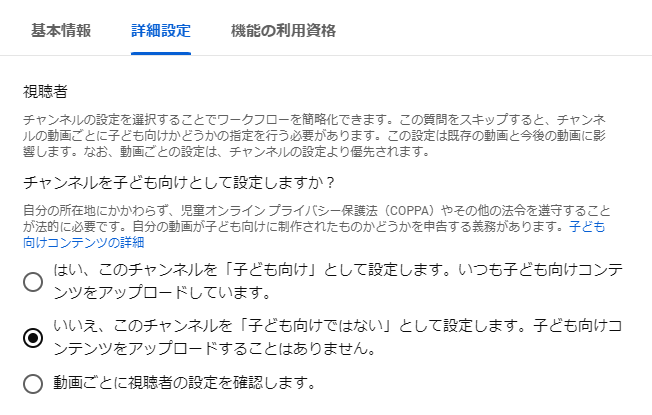
自分の動画が完全に子供向けのものでなければ「いいえ~」を選択します。
これは動画投稿時にも変更できるので、分からなければ「動画ごとに視聴者の設定を確認します」を選択すればいいかと思います。
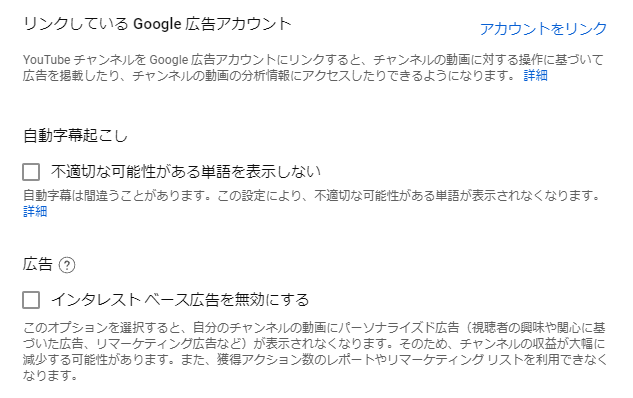
その下の「リンクしているGoogle広告アカウント」「自動字幕起こし」「広告」はそのままで無視しました。
「クリップ」とは、視聴者が動画の印象的なシーンをピックアップしてSNSなどで共有するための機能です。

これは好みで選択すればいいかと思います(動画投稿時でも変更可能)。
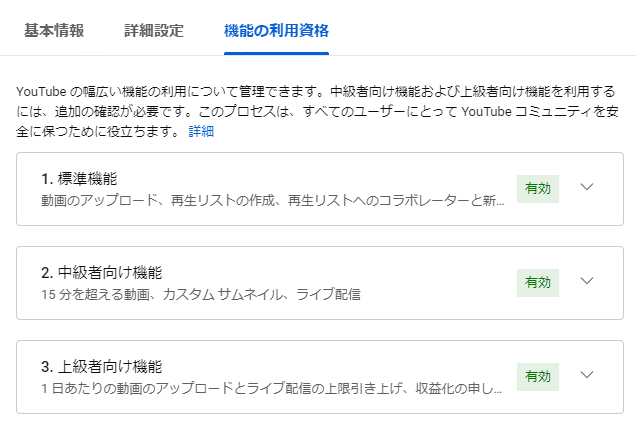
機能の利用資格
次に「機能の利用資格」を開きます。
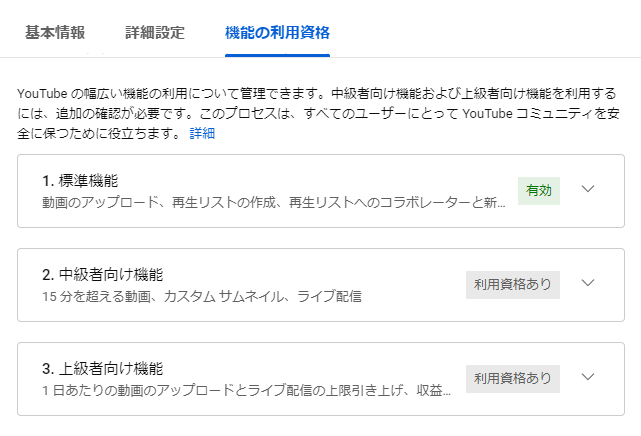
これらは動画の投稿や管理についての重要な機能なので、すべて利用できるようにしておきます。
以下3つの機能を有効にします。
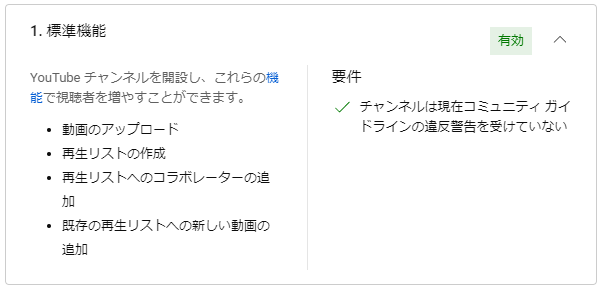
1.標準機能
「標準機能」は最初から有効になっているはずです。
2.中級者向け機能
「中級者向け機能」を有効にするには、まず「電話番号を確認」をクリックします。
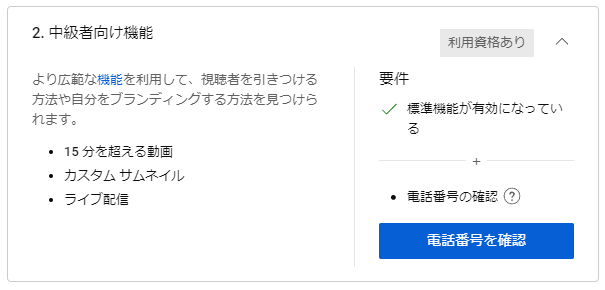
別ウィンドウが開くので指示に従います。
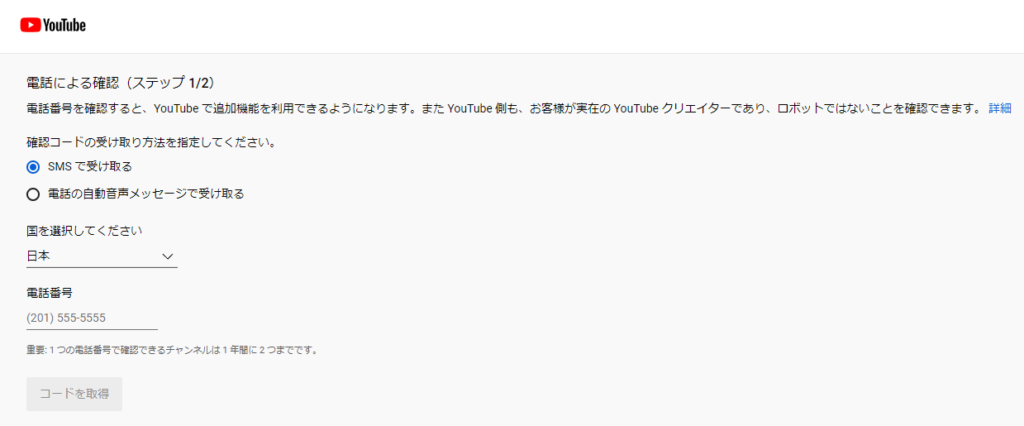
- 確認コードの受け取り方法を選択(私は「SMSで受け取る」)
- 国を選択(私は「日本」)
- 電話番号を入力(例:090-1234-5678)
「コードを取得」をクリックします。
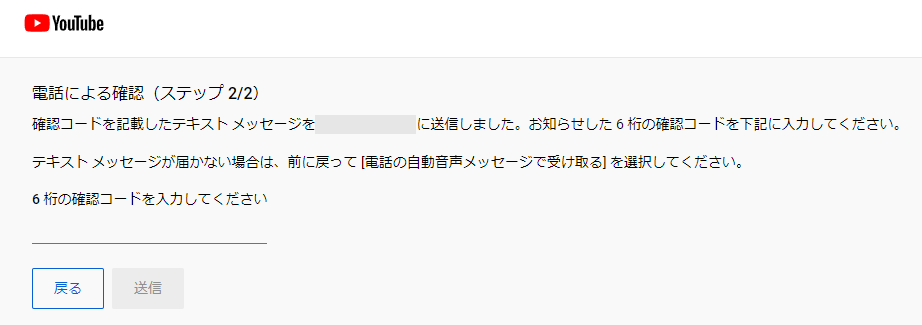
送られてきたSMSに記載の6桁の確認コードを入力して「送信」をクリックします。
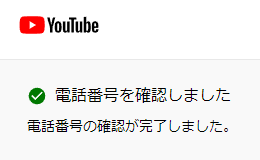
電話番号の確認が完了しました。この画面は閉じて構いません。
設定の画面を確認すると中級者向け機能が有効になっています。
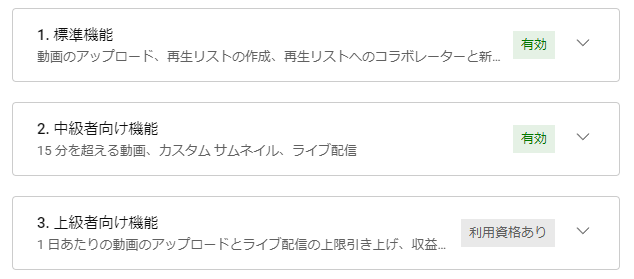
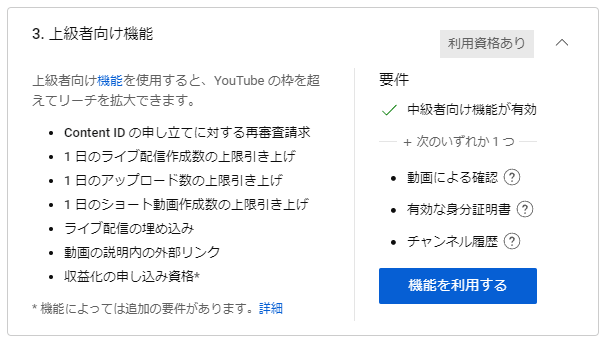
3.上級者向け機能
「上級者向け機能」は私の場合「有効な身分証明書」にて申請しました。
まず「機能を利用する」をクリックします。
私は「有効な身分証明書を使用する」にチェック。
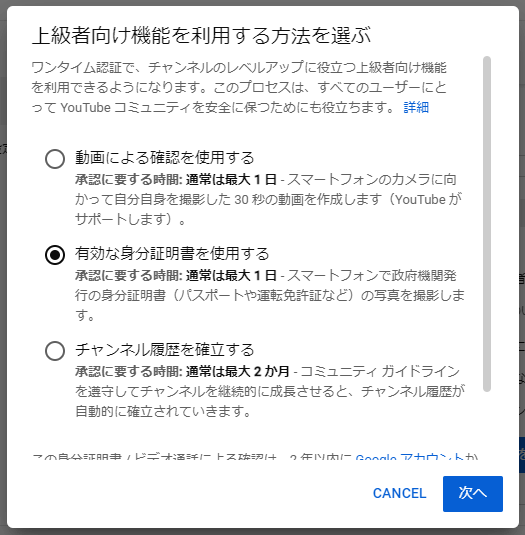
「次へ」をクリックします。
「確認プロセスを始めるためにスマートフォンにメールを送信します」の画面が表示されます。
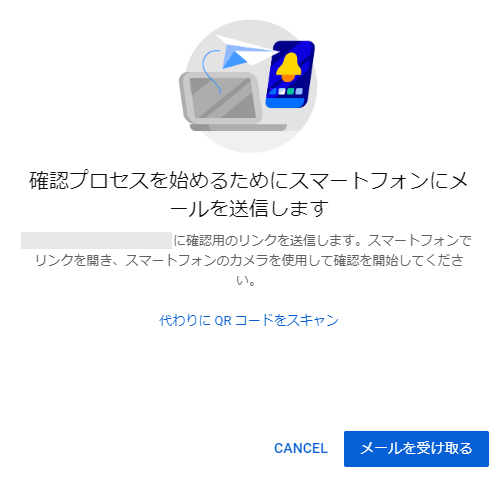
「メールを受け取る」をクリックします。
「メールを送信しました」の画面が表示されます。
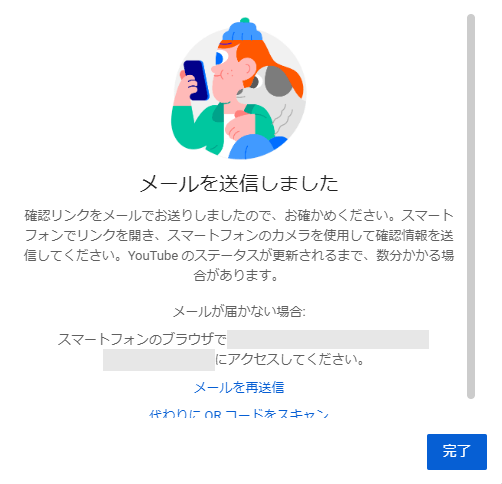
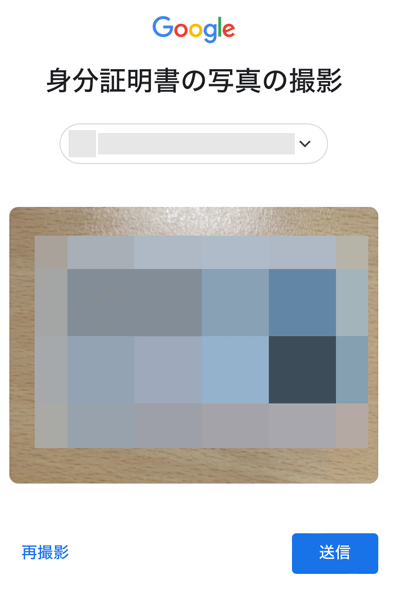
あとは画面の指示に従って身分証明書を撮影、送信します。
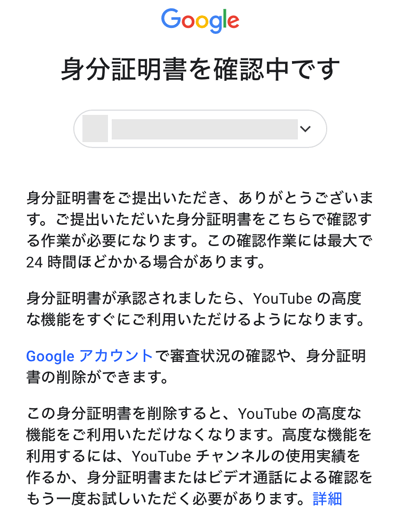
「身分証明書を確認中です」の画面が表示されます。
YouTube Studioに戻り、さきほどの「メールを送信しました」の画面の「完了」をクリックします。
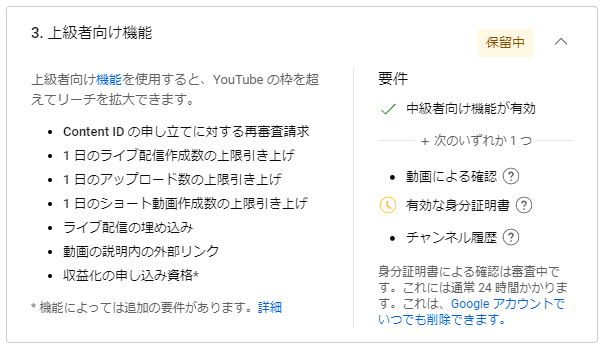
すると「上級者向け機能」が保留中になっています。
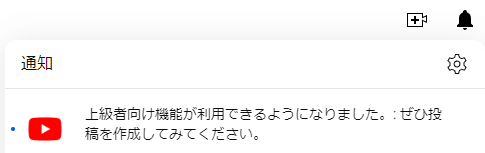
翌日、通知があり承認されました。
これですべて有効になり全機能が使えるようになります。
アップロード動画のデフォルト設定
次に「アップロード動画のデフォルト設定」をクリックします。
基本情報
「基本情報」の「タイトル」と「説明」では動画の定型文をあらかじめ入力することができます。
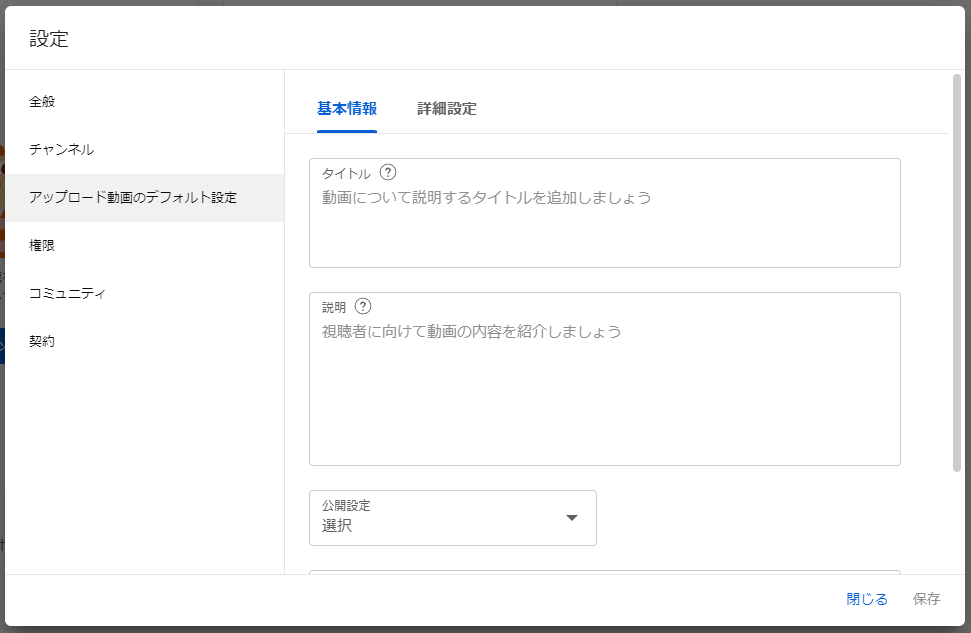
私はとりあえず空欄のままです。
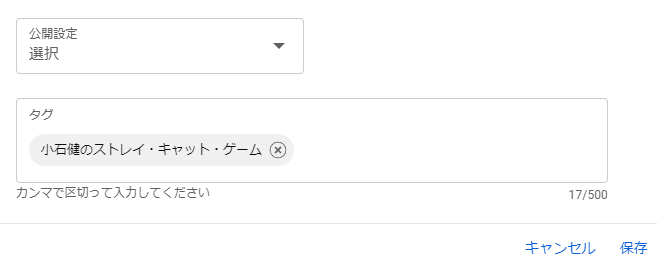
その下の「公開設定」のなかから「公開・非公開・限定公開」のいずれかを選択します。
私はここも無視して、動画投稿の都度に選択することにしました。
その下の「タグ」は動画のキーワードのようなものです。
私はメインチャンネルの動画投稿時にいつも10個入力しています。
ここでは自分のチャンネル名だけ入力しておきました。
これらもあとで設定変更できるので、都度付け加えるといいかと思います。
詳細設定
「詳細設定」の「チャプターと重要なパートの自動生成を行う」はチェックを外しました。

私はチャプターを自作する場合が多いからです。
「ライセンス」は「標準のYouTubeライセンス」のまま。
「カテゴリ」は動画を同じジャンルで統一するのであれば当てはまるものを選択します。

これらも動画投稿時に選択できます。
「動画の言語」と「タイトルと説明の言語」は「日本語」を選択しました。
「字幕の認定」は「なし」のままです。
「コメント」をどうするか選択します。
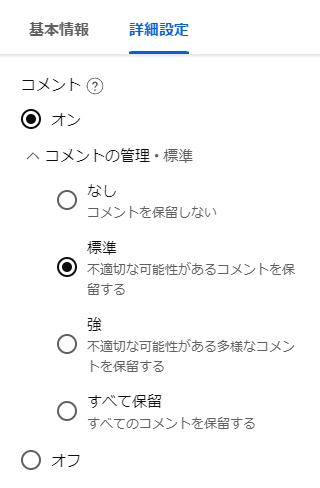
ここでは「標準」のままにしました。
その下の高評価数の表示・非表示を選択します。

ここではチェックを入れたままにしました。
権限
「権限」はチャンネルの管理やユーザーの役割についての設定です。
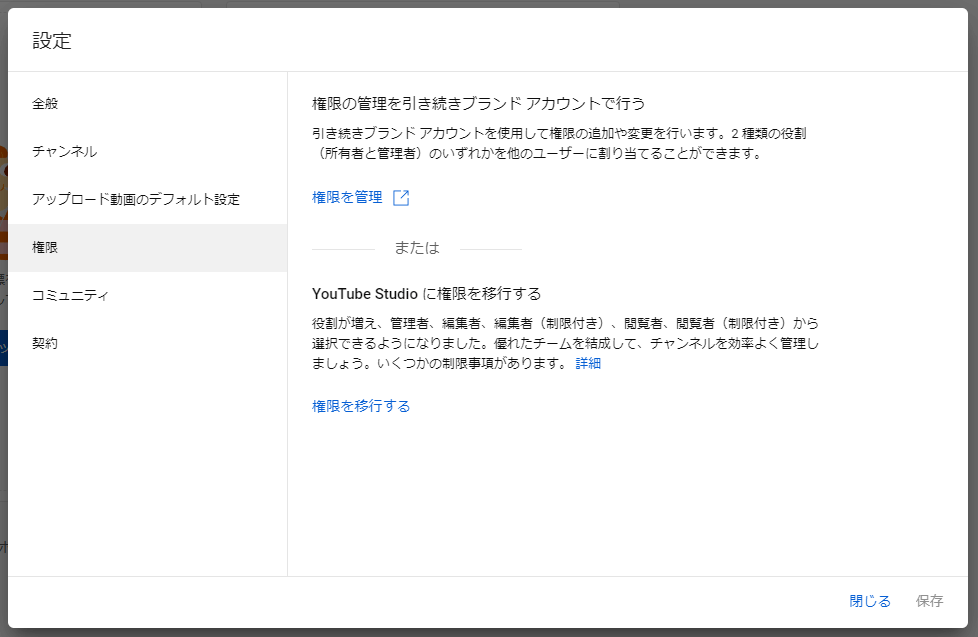
私は1人でやっているので無視しました。
コミュニティ
次に「コミュニティ」をクリックします。
自動フィルタ
ここでもチャンネル管理のユーザーを追加することができます。

また、特定の視聴者のコメントを非表示にしたり、ライブ配信の設定をしたりすることもできます。
私はここも今のところ空欄のままです。
デフォルト
ここでもコメントの設定ができます。
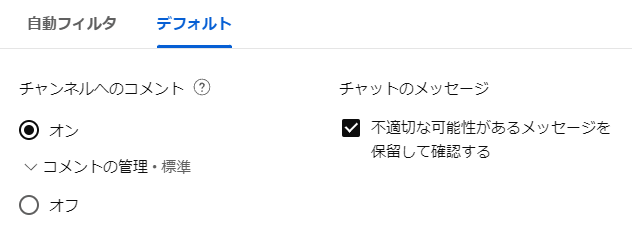
「チャットのメッセージ」の「不適切な可能性があるメッセージを保留して確認する」には一応チェックを入れました。
契約
「契約」は、チャンネルを開設したばかりは関係ないはずです。
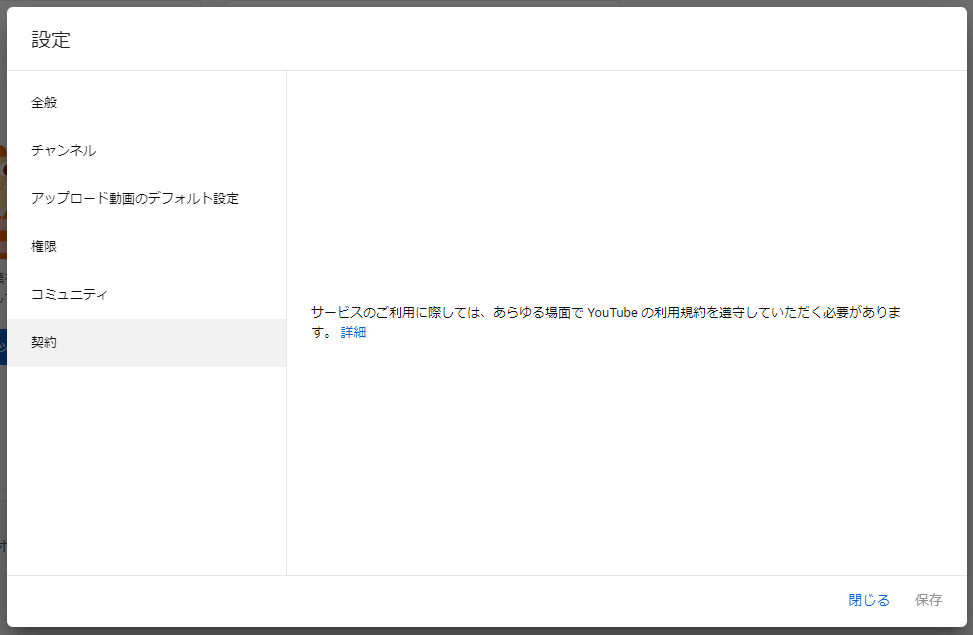
まだ何も表示されていません。
「機能」は有効にしておく

以上、YouTube Studioの設定をおおまかに見ていきました。
分からないところはとりあえずそのままにしておけばいいのですが、「機能の利用資格」は最初に有効にしておいた方がいいかと思います。
前述のように、上級者向け機能は有効化までに時間がかかるからです。
いずれは使う機能なので、すべて有効化するのをおすすめします。
コメント