
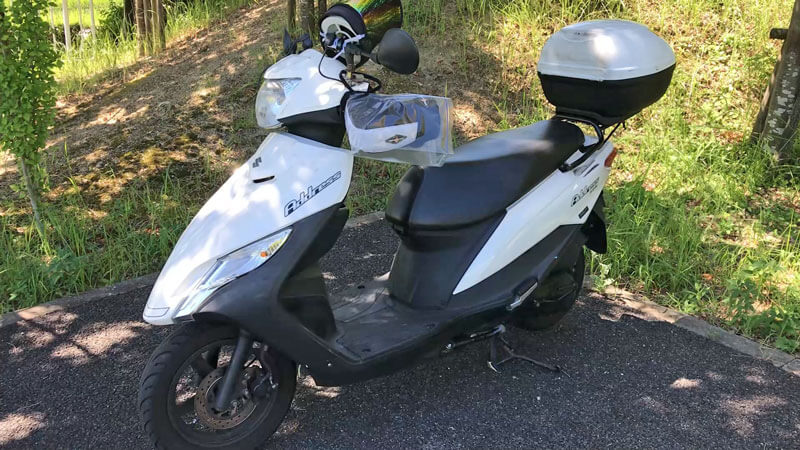
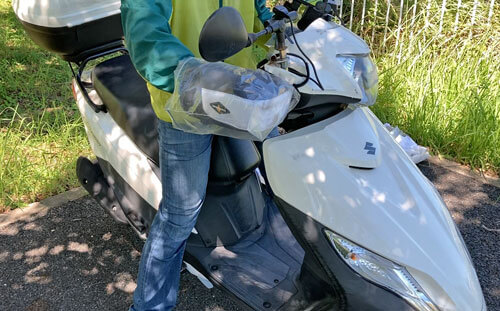
先日、原付二種スクーターのアドレス125(DT11A)のエンジンオイルを交換しました。
ついでにオイルストレーナとOリングも純正品に交換しました。
今回はその模様をお伝えします。

小石健と申します。YouTubeチャンネルはこちら。
4万kmで自身初のエンジンオイル交換
今回の内容はYouTubeに動画もアップしているので、よければこちらもご覧ください。
これまでエンジンオイルの交換はすべて業者に頼んでいましたが、走行距離4万kmにして初の作業となります。
というのも、これにはワケがあります。
この前、アドレス125を購入したバイク店に恒例の1年点検をお願いしたところ、なぜか今年は断られました。
走りすぎのため故障が見つかって整備しても完全に良くはならない、とお茶を濁されました。
どうも私以外のUber Eats の配達パートナーと整備不良で揉めたようで、あまり年季の入ったバイクは見たくない、というのが実情のようです。
というわけで、バイク店に見放されたわが愛車をこれから自身の手で整備していこうと思いました。

まずはエンジンオイルの交換から始めよう。
エンジンオイル量の点検
交換の前にエンジンオイルの量に異常がないか点検します。
まず平坦地でメインスタンドを立て、エンジンを2~3分間アイドリング運転させます。
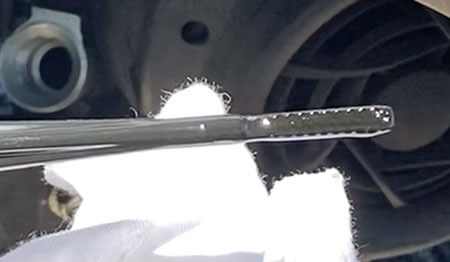
エンジンを停止して再度2~3分後、オイルレベルゲージを手で回して外します。

付着したオイルをウェスなどで拭きます。
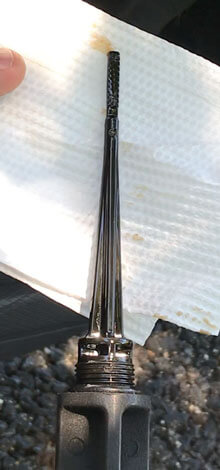
次にオイルレベルゲージをねじ込まず差し込んで引き抜きます。

オイル(油面)がアッパレベルとロアレベルの間にあるのが正常のようです。
今回は明らかにアッパレベル以上ありました。

といっても、前回オイルを交換したのはバイク用品店です。プロがやったことのなのでこれでも大丈夫、ということにします。
最後にオイルレベルゲージを締めて点検は終了です。
エンジンオイルを抜く
次にエンジンオイルを抜きます。
さきほどと同様にアイドリング運転をしたのち2~3分置きますが、今回はすでに済ませたのでそのまま行います。
「廃油受け」をドレンボルトの下に置きます。
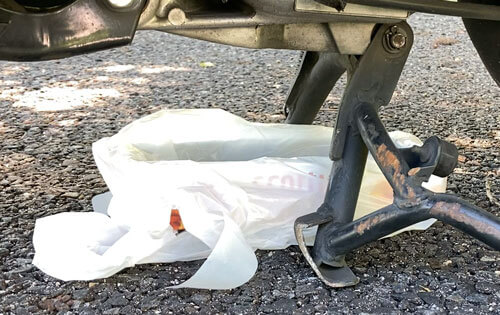
これは上面を切り離したティッシュの空箱にビニール袋をかぶせたもので、メインスタンドの間に収まります。
廃油を取りこぼすことはありません。
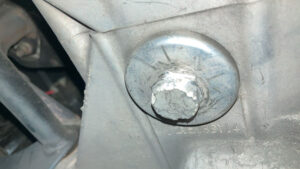
次にメインスタンドのすぐ近くにあるドレンボルトを17mmのレンチで回します。
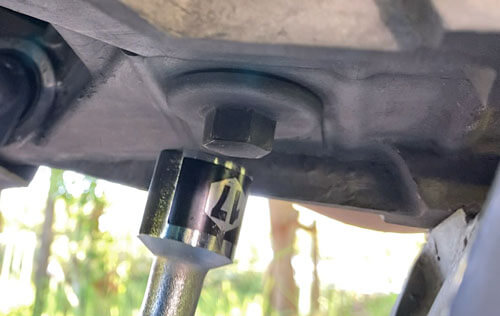
私が使ったのはこのレンチです。

しかしボルトが固かったため、最初はレンチの柄をゴムハンマーで叩いて回しました。
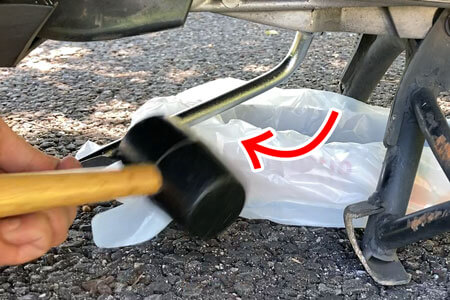
ある程度ボルトをゆるめたらあとは手で回して素早く外します。
あとはアドレス125にまたがり車体を左右に傾けてオイルを絞り出します。
廃油の処理
廃油をそのまま垂れ流して捨てるのはNGです。
私はウェスなどに染み込ませるのは面倒だと思ったので、ダイソーで購入した「天ぷら油凝固剤」を使いました。
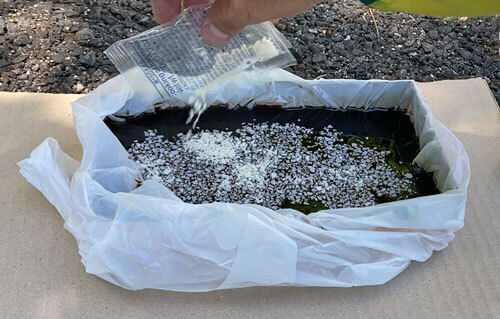
これ1包で650mlに対応していて、ちょうどアドレス125のエンジンオイル量と同じです。ナイスアイディア。
しかし…
オイルはまったく固まりませんでした。なんの変化もありません。
結局キッチンペーパーに吸わせることにしました。
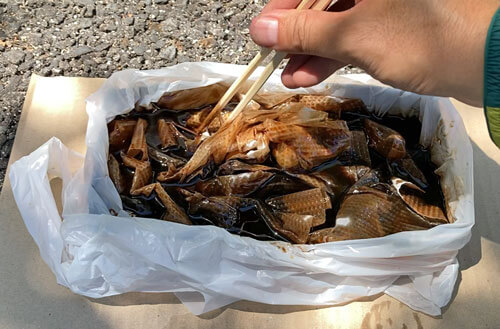
たっぷり吸わせたあとで袋を縛り廃棄します。
現在はネットの情報を参考にダイソーで購入した油吸収パッドを使って廃油を吸わせています。
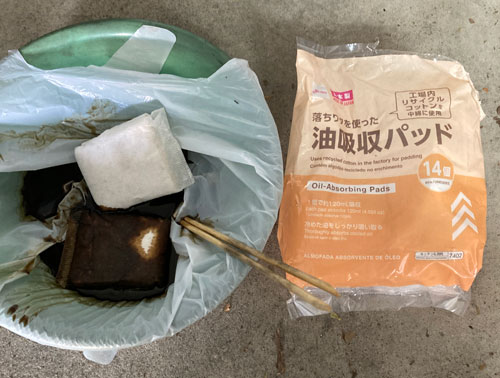
意外にけっこう吸うのでコスパに優れていると思います。
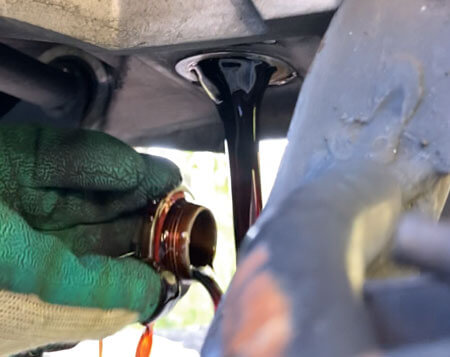
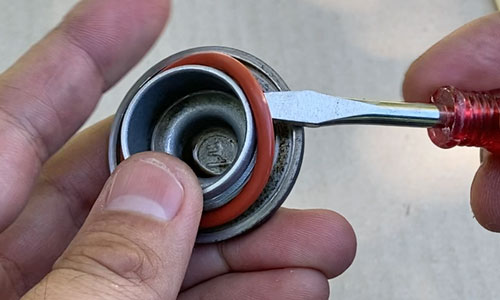
Oリングの交換
ドレンボルトのOリングを外して交換します。
私は「モノタロウ」というサイトで純正品を購入しました。
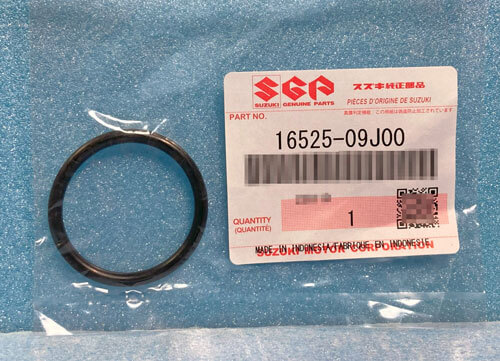
品番は「16525-09J00」です。
モノタロウには多くのバイク用品が販売されていますが、事業利用の客しか購入できない物があります。このOリングもそうでした。
会員登録の際はご注意ください。
「個人」で登録すると目当ての品が購入できないおそれがあります。
または「ウェビック」という通販サイトでも販売されています。
こちらは個人と事業の別がないので普通に購入できます。
Amazonなどは、品切れしていたり別の商品と差し替えられていたりするおそれがあるので、アドレス125に適合するか必ずご確認ください。

Oリングを外したドレンボルトはパーツクリーナーで掃除しました。
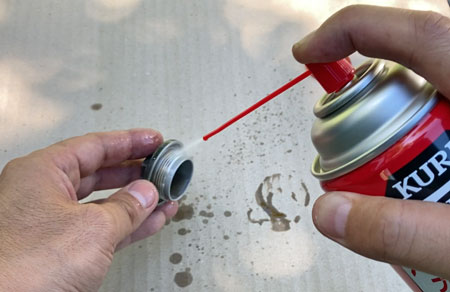
この「プラスチックセーフ」なら他にも用途が広がるかと思います。

ドレンボルトに新しいOリングを装着。
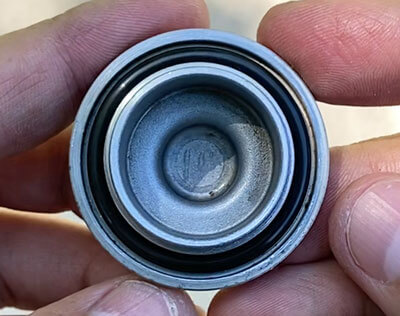
エンジンオイルの交換を任せていたバイク用品店では毎回Oリングも交換してもらっていましたが、今回見たところ目立つような劣化はありませんでした。
それでもオイル漏れを防ぐにはやはり毎回交換した方がいいのかもしれません。
その辺は自己責任で…
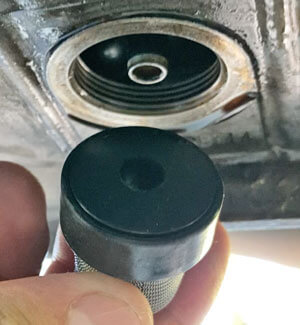
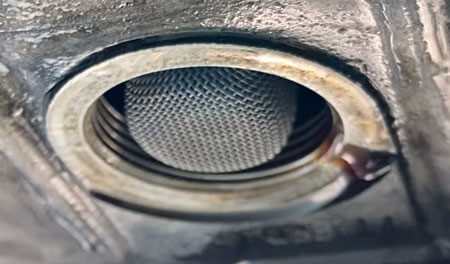
ストレーナの交換
ストレーナは毎回交換する必要はないそうですが、後学のために交換しました。
が、つかみにくくてなかなか外れません。
網の部分を手でつかんで回しながら半ば強引に引き抜きました。
網がつぶれましたが交換するので問題ありません。交換しない場合は外さないほうが無難です。
ストレーナとプラグもモノタロウで純正品を購入。

ストレーナの品番は「16520-09J00」、プラグは「16526-09J00」です。
プラグは指でストレーナに押しかぶせました。
Oリング同様、以前のストレーナも劣化は見当たりませんでしたが、一応新しい方を装着します。
指で押し込むと、すんなりと装着することができました。
エンジンオイルを入れる
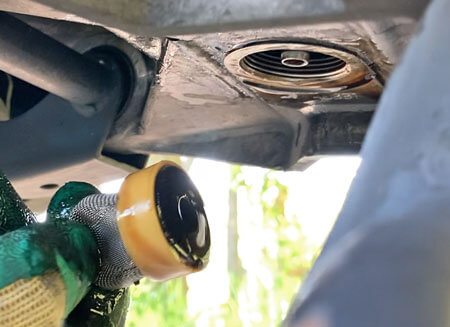
今度は反時計回りでドレンボルトを締めます。
ドレンボルトの締め付けトルクは35N・mです。
私はトルクレンチを使って締めるようにしましたが、これだと固く締まりすぎるような気もします。
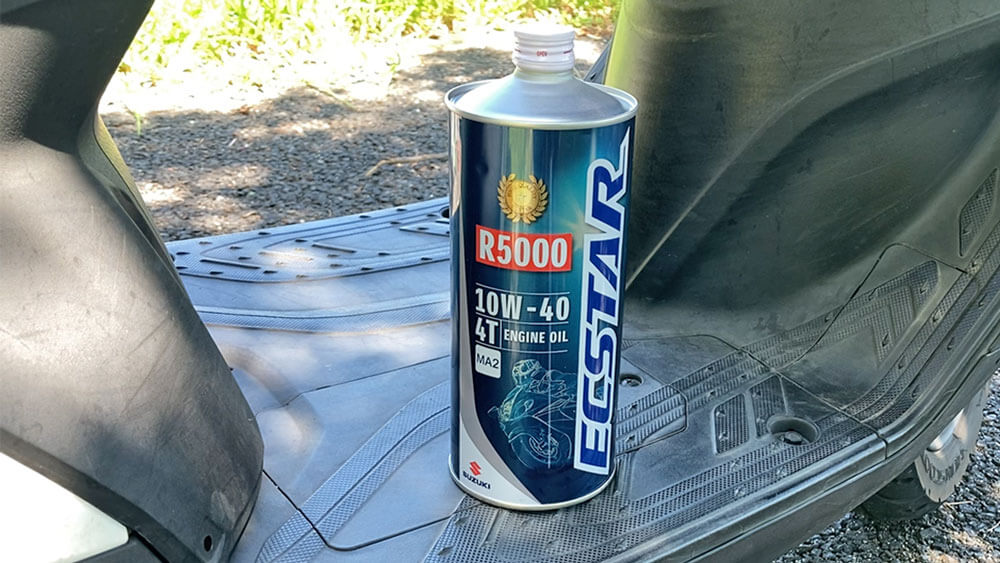
エンジンオイルはスズキの純正品を購入しました。

「ECSTAR(エクスター) R5000 MA2」(1リットル)です。
アドレス125(DT11A)の取扱説明書によると推奨オイルは下図のとおりです。
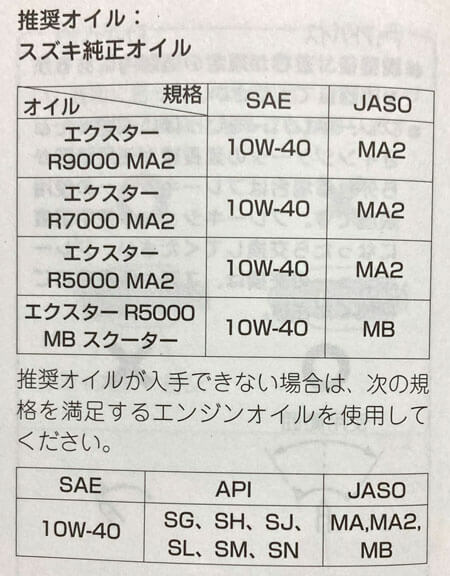
規格が合うなら社外品でも良さそうですが、とりあえず純正品(の安いもの)を購入しました。
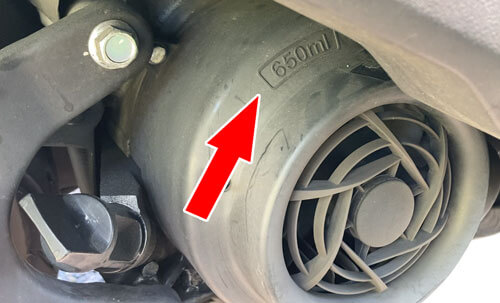
入れるオイルの量は650mlです。
オイルレベルゲージを外してオイルを入れます。
私はダイソーで購入した漏斗と計量カップを使いましたが、これがやりにくい。
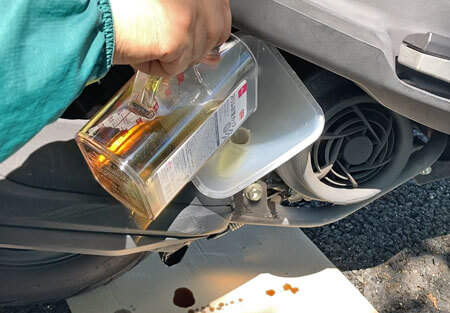
漏斗はマフラーに干渉するためサイドスタンドを立てたものの、それでもこぼれそうでした。
やはりオイルジョッキが良さそうです。
ノズルが長く、目盛りやフタが付いているものが便利そうです。

オイルを入れ終わったら、オイルレベルゲージを拭いて締めます。
再度エンジンオイル量の点検
そして冒頭同様に2~3分のアイドリング運転後、さらに2~3分置いてエンジンオイルの量を点検します。
やはり変わらずアッパレベル以上ありました。
といっても業者(プロ)と同じ結果なので、これで良しということにします。
あとは周りのオイル汚れを拭いて終了です。
あと、次回の交換のために走行距離も忘れずに何かにメモしておきます。私はスマホでメーターの写真を撮りました。
ちなみにアドレス125のエンジンオイル交換時期は以下となります。
初回:1か月または1000km
以降:6000kmまたは1年ごと
私は初回以降はだいたい3000kmごとに交換してもらっていました。
慣れれば簡単なので、今後も自分で交換していくつもりです。
コメント
コメント一覧 (5件)
「天ぷら油凝固剤」使いがちですね。
これ、上げ油の温度で凝固するんですよね、エンジンの廃油の温度では固まらないです。
すぐに寒天のように固まると思いましたが無知でした…。
そうなんですね、私もずっと手で締めてきたけどトルクレンチを買ってみようかと思い規定トルクを調べていてこちらにたどり着いたのですが、悩んじゃいますね…
失礼しました
規定トルクは18N・mではないでしょうか?
ほかのサイトだと大体そうなってますね
サービスマニュアルを見たわけではないので確実ではありませんが。。。
サービスマニュアルを確認したところ、オイルドレンプラグの締め付けトルクはやはり35N・mでした。
とはいえ私は固着してボルトがナメたことがあるので今は手ルクレンチで締めています。
そのあたりもすべて自己責任となりますが。