

前回、サブチャンネル開設に当たってAV化ファミコンを購入したと述べました。
今回はAV化ファミコンの紹介と掃除の模様についてお伝えします。
レトロゲームを始めようと考えているかたのご参考になれば幸いです。

小石健と申します。YouTubeチャンネルはこちら。
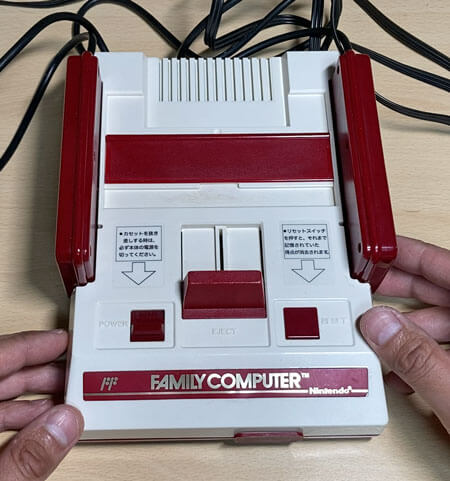
AV化ファミコンを購入した
AV化ファミコンを紹介したYouTubeの動画はこちらです。機能の詳細はこちらをご覧ください。
私の環境では当初のRFスイッチは接続できません。コンポジットケーブルに改造されたAV仕様のファミコンが必要です。
だったら「レトロフリーク」などの優秀な互換機があるじゃないか、と思われるかもしれません。
ですが実機でプレイしたい。
ということで、ようやっと手に入れたという次第です。
といっても、自分では改造できないためメルカリで購入しました。約6000円。
ぱっと見は問題なさそうですが、ファミコンという年代物をメルカリという魔境で購入した、というのが一抹の不安ではあります。
ファミコンの掃除
物は良さそうですが、所々の汚れと多少の臭いが気になるため接続前に掃除をしました。
その模様はこちらの動画をご参照ください。
全部分解して薬品に漬けるのが最善だと思いますが、そこまでのやる気と技術のない私のような人向けの方法となります。
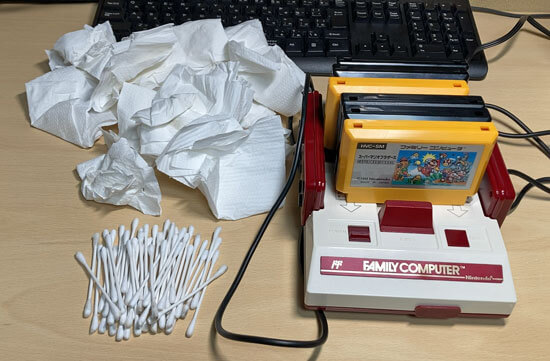
使用道具
使った道具は以下のとおりです。
まずエアダスター。

次に無水エタノール。

この2つは臭いにご注意ください。エアダスターは物によってはガスがけっこう臭い。
要換気です。
あとは、無水エタノールを入れる容器・キッチンペーパー・綿棒・ピンセット・ハケです。
各所を掃除する
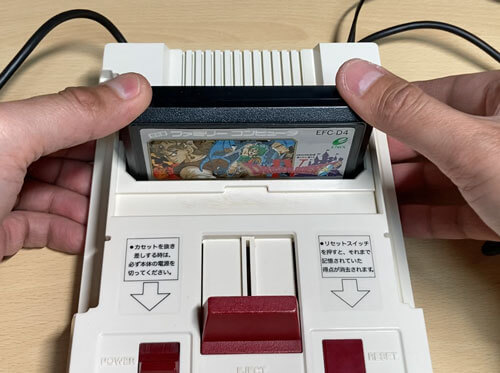
まず、ピンセットで目立つゴミや汚れを取り除きます。
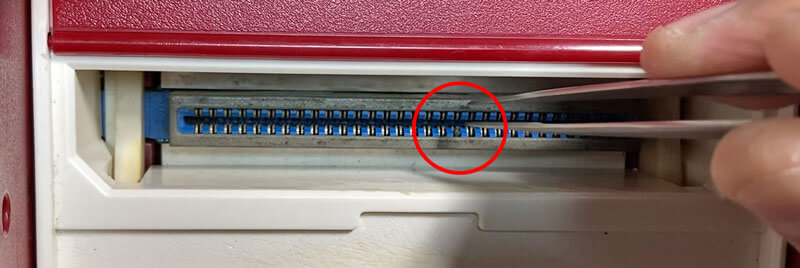
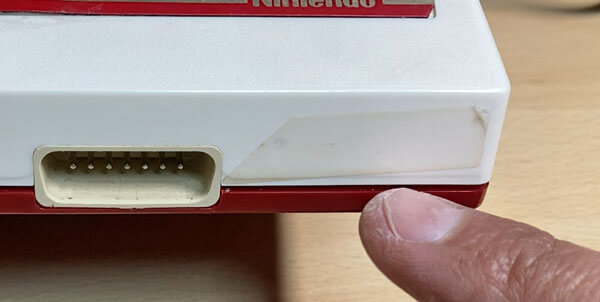
私の場合、カセットを挿す端子にゴミが挟まっていました。
あと、文字の刻印の中に溜まっていた手アカのような汚れをほじくり出します。

この汚れは頑固でした。
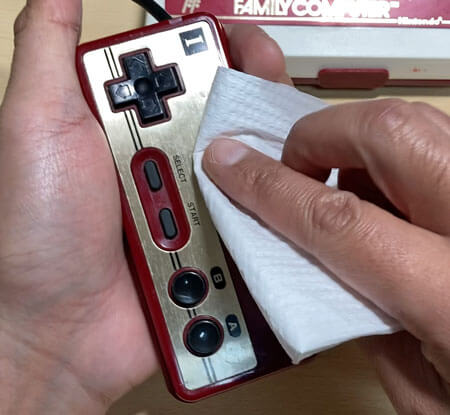
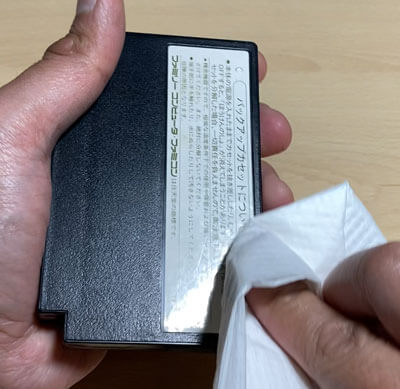
次に無水エタノールを浸したキッチンペーパーでコントローラー全体を拭きました。
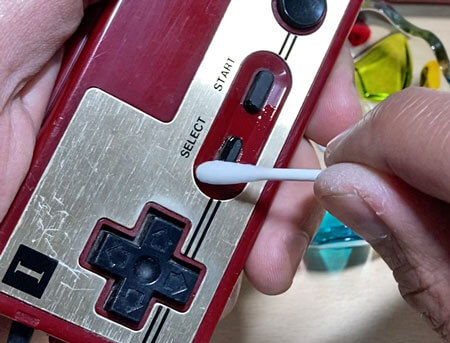
くぼみや溝の細かな箇所は無水エタノールをつけた綿棒で拭きます。
同様にコントローラー側面やボタンの手アカも落とします。
以上の要領で、本体のほかケーブルやアダプターも拭きます。
ただ、本体前面のシールの文字は拭いたら消えてしまいました。
シールは避けた方が無難のようです。
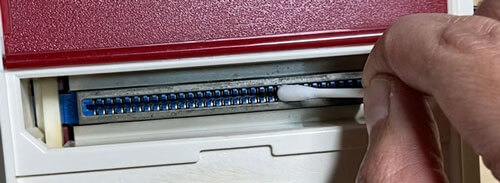
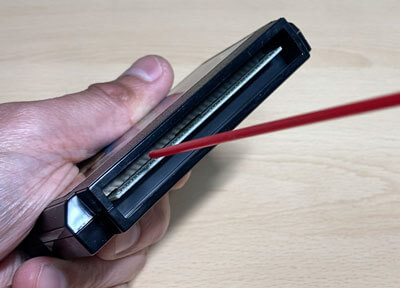
またカセットを挿す端子部分は、拭く前にエアダスターでホコリを吹き飛ばします。
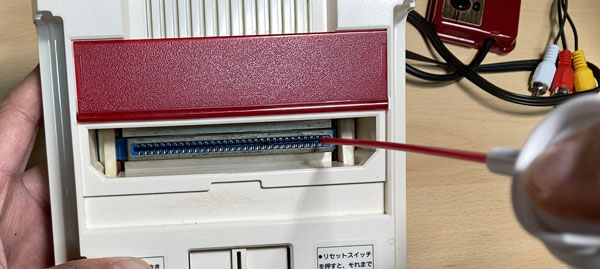
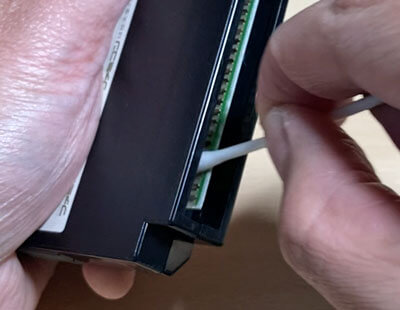
あとは端子を無水エタノールをつけた綿棒で拭きました。
臭いは若干残る
以上、分解しなくてもだいぶきれいになりました。
肝心の臭いですが、コントローラーはほとんど臭わなくなりました。無水エタノール強し。
ただ本体はまだほんのりと臭います。
これが汚れによるものではなく、経年劣化したファミコン自体の臭いなのかは不明です。
カセットの掃除
あとは以前に購入したカセットも掃除しました。
ファミコン同様、まず無水エタノールをつけたキッチンペーパーで全体を拭きます。
ただし裏面のシールは文字が消えてしまうので避けた方が無難です。
次に内側のホコリをエアダスターで吹き飛ばします。
そして無水エタノールをつけた綿棒で内側と端子を拭きます。
仕上げに使ったのは「レトロゲーム復活剤」です。

これは接点復活剤で、防錆効果があるそうです。
これを端子に塗ります。
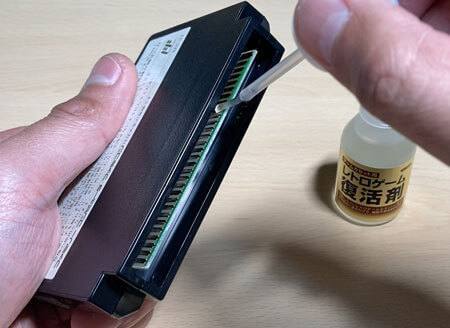
塗りっぱなしでいいのかよく分からないので、最後に軽く綿棒で拭きました。
カセットを接続した
以上で掃除は終わりです。
ファミコンとカセット6本に費やしたキッチンペーパーと綿棒の量は下図のとおりです。
無水エタノールとレトロゲーム復活剤の量はまだまだ余裕があるので今後も使えます。
ということで、カセットの接続具合をチェック。
きしんだりゴミを巻き込んだりといった感触はなく、すべてスムーズに抜き挿しすることができました。
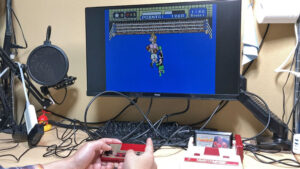
あとはモニターに映るか、です。
重曹で臭いを消す
ですが、ほんのりとはいえ臭いがやはり気になります。
そこで最終手段として重曹を使用。
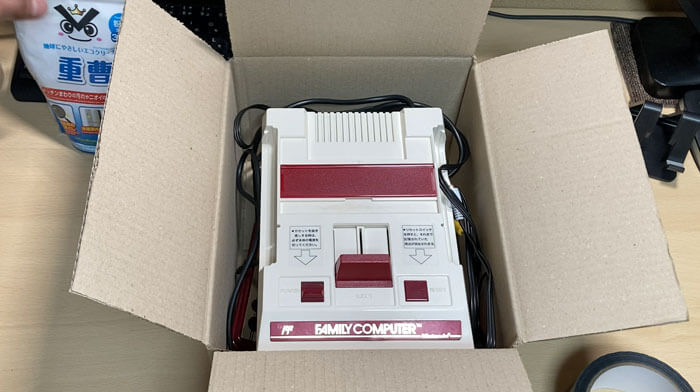
適当な容器に移した重曹とファミコンを段ボール箱に同封。
テープで密閉します。
重曹は汚れを落とすだけではなく、臭いを消す効果もあるそうです。
この状態でしばらく置き、次はこれを開封して臭いを確認したうえでモニターに接続します。
コメント