先日、Uber Eats の配達で使う原付の自賠責保険を更新しました。
今回は、更新した自賠責保険の証明書をアプリの「Uber Driver」からアップロードして承認されるまでの手順お伝えします。
初めて手続きされるUber Eats 配達パートナーのご参考になれば幸いです。
![](https://koishiken.com/wp-content/uploads/2022/07/koishiken-150x150.jpg)
小石健と申します。YouTubeチャンネルはこちら。
原付の自賠責保険を更新した
今回の内容はYouTubeに動画もアップしているので、よければこちらもご覧ください。
私は自賠責保険の期限切れが近づいた頃、加入している保険会社から更新通知のハガキが届きました。
![自賠責保険の更新通知のハガキ](https://koishiken.com/wp-content/uploads/2023/07/jibaiseki-renewal-notice-postcard.jpg)
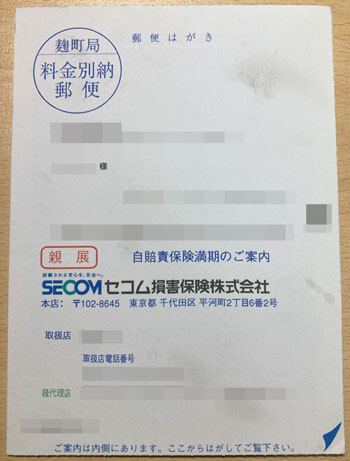
これを原付を購入したバイク屋に持って行き、自賠責保険を更新してもらいました。
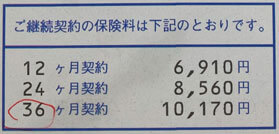
ちなみに契約期間は36か月を選択。保険料は10170円でした。
![自賠責保険の保険料](https://koishiken.com/wp-content/uploads/2023/07/jibaiseki-contract-fee.jpg)
用意する物
まず、更新した自賠責保険のシールを貼ったナンバープレートを一応スマホで撮影しておきます。
![アドレス125のナンバープレート](https://koishiken.com/wp-content/uploads/2023/07/address125-license-plate.jpg)
あとは新旧の自賠責保険の証明書を手元に用意します。
![新旧の自賠責保険証明書](https://koishiken.com/wp-content/uploads/2023/07/2-jibaiseki-certificates.jpg)
証明書には車両のナンバープレートの情報が記載されている必要があります。
更新した証明書のみだと承認されない
このように、更新した証明書のみを撮影して送信してもUberには承認されません。
![新しい自賠責保険証明書 の撮影画面](https://koishiken.com/wp-content/uploads/2023/07/new-jibaiseki-certificate-shooting-screen.jpg)
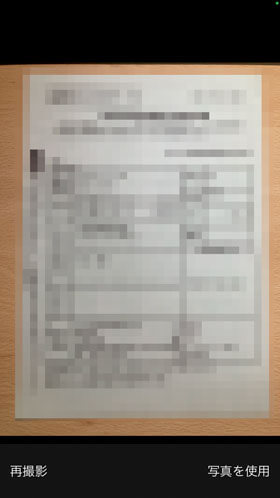
「送信された書類は効力の発生日が将来の日付です」と表示されます。
![自賠責保険証明書がUberで不承認された](https://koishiken.com/wp-content/uploads/2023/07/uber-jibaiseki-certificate-error.jpg)
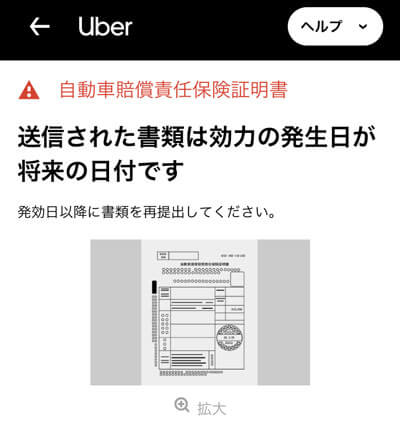
余裕をもって期限切れの前に更新したので当然のことだと思いますが、なぜかはじかれてしまいます。
確か前回も更新できず、サポートに問い合わせたことを思い出しました。
![Uberで「書類がアップロードできない」の質問](https://koishiken.com/wp-content/uploads/2023/07/uber-documents-cannot-be-uploaded-question.jpg)
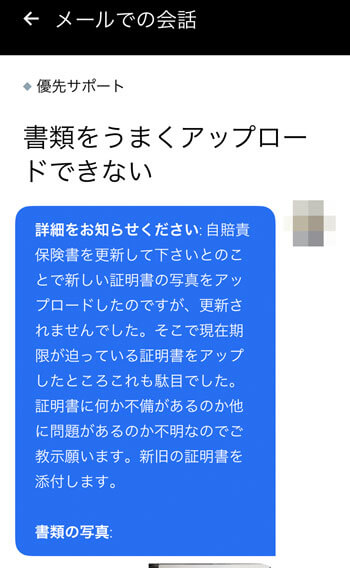
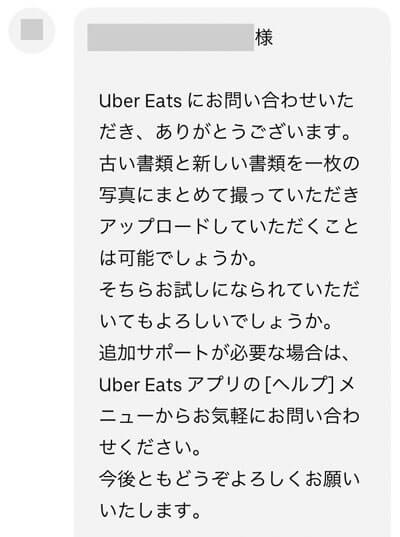
過去のメッセージを確認すると、新旧の自賠責保険証明書を並べて、1枚の写真に撮るといいようです。
![Uberで「書類がアップロードできない」の回答](https://koishiken.com/wp-content/uploads/2023/07/uber-documents-cannot-be-uploaded-answer.jpg)
更新手順
以下は私が実際に行ったiPhone(SE2)の画面を元に、自賠責保険証明書の更新手順をお伝えします
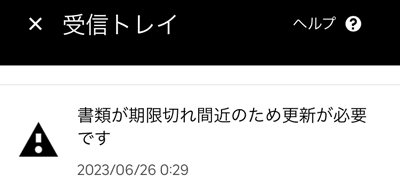
まず、アプリの「Uber Driver」の「受信トレイ」を開き、「書類が期限切れ間近のため更新が必要です」のメッセージをタップします。
![Uber Driverの書類更新のメッセージ](https://koishiken.com/wp-content/uploads/2023/07/uberdriver-document-update-message.png)
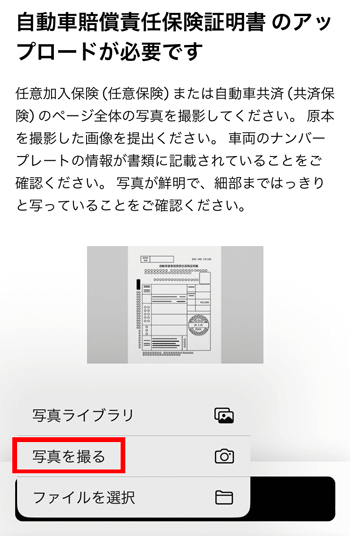
「車両に関する要件」の「自動車賠償責任保険証明書」をタップします。
![Uber Driverの提出書類の画面](https://koishiken.com/wp-content/uploads/2023/07/uberdriver-submission-document-screen.png)
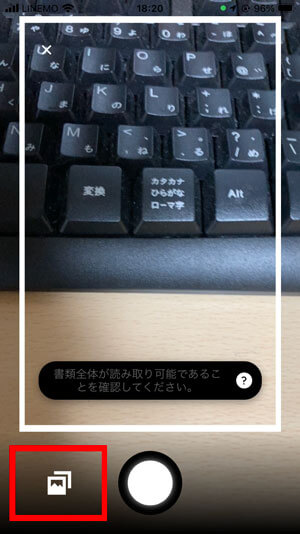
あらかじめ撮影した写真も使えますが、私は「写真を撮る」をタップしました。
![Uber Driverの自賠責保険証明書の撮影ボタン](https://koishiken.com/wp-content/uploads/2023/07/uberdriver-jibaiseki-certificate-shoot-button.png)
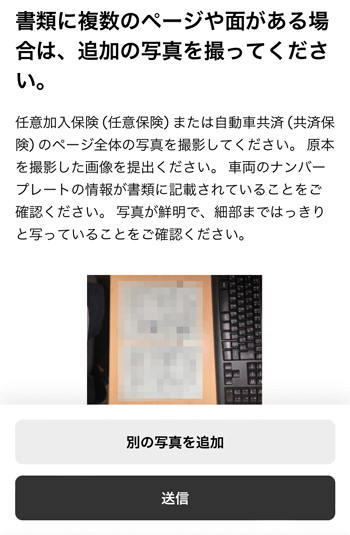
このように新旧の証明書を並べて撮影します。
![Uber Driverの自賠責保険証明書の撮影画面](https://koishiken.com/wp-content/uploads/2023/07/uberdriver-jibaiseki-certificate-shooting-screen.jpg)
![](https://koishiken.com/wp-content/uploads/2022/07/koishiken-150x150.jpg)
画面の向きはタテで構いません。
撮影したら「写真を使用」をタップします。
写真にブレやボケなどが無ければ「送信」をタップします。
![Uber Driverの自賠責保険証明書の写真送信画面](https://koishiken.com/wp-content/uploads/2023/07/uberdriver-jibaiseki-certificate-photo-sending-screen.png)
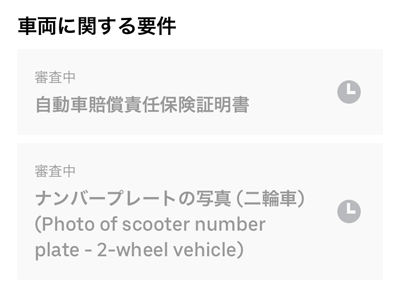
「車両に関する要件」の画面に戻ると、自賠責保険証明書が「審査中」と表示されています。
![Uber Driverの自賠責保険証明書の審査中の画面](https://koishiken.com/wp-content/uploads/2023/07/uberdriver-jibaiseki-certificate-screening-screen.png)
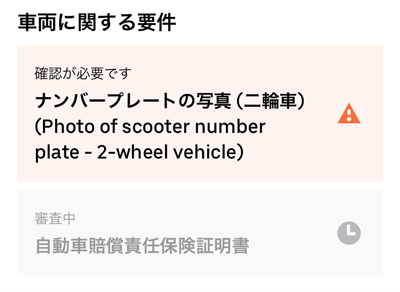
「ナンバープレートの写真(二輪車)」が「確認が必要です」と赤く表示されている場合は、ここをタップします。
「この書類は有効期限が切れています」の画面が表示されるので、ナンバープレートの写真も更新します。
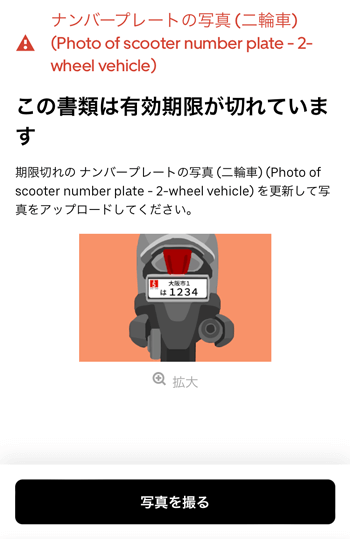
![Uber Driverのナンバープレートの期限切れの画面](https://koishiken.com/wp-content/uploads/2023/07/uberdriver-license-plate-expiration-screen.png)
「写真を撮る」をタップします。
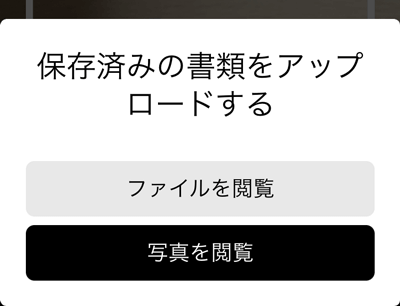
ここではあらかじめ撮影した写真を使うので、左下のアイコンをタップします。
![Uber Driverのナンバープレートの撮影画面](https://koishiken.com/wp-content/uploads/2023/07/uberdriver-license-plate-shooting-screen.jpg)
「写真を閲覧」をタップします。
![Uber Driverのナンバープレートの写真を選択するボタン](https://koishiken.com/wp-content/uploads/2023/07/uberdriver-license-plate-photo-selection-button.png)
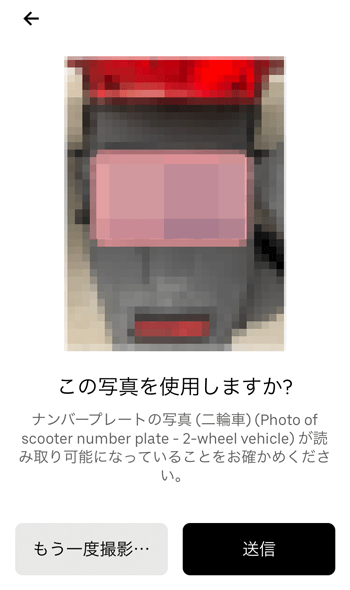
撮影したナンバープレートの写真をタップし、問題なければ「送信」をタップします。
![Uber Driverのナンバープレートの写真を送信する画面](https://koishiken.com/wp-content/uploads/2023/07/uberdriver-license-plate-photo-submission-screen.png)
「ナンバープレートの写真」も「審査中」になりました。
![Uber Driverのナンバープレートの写真の審査中画面](https://koishiken.com/wp-content/uploads/2023/07/uberdriver-license-plate-photo-screening-screen.png)
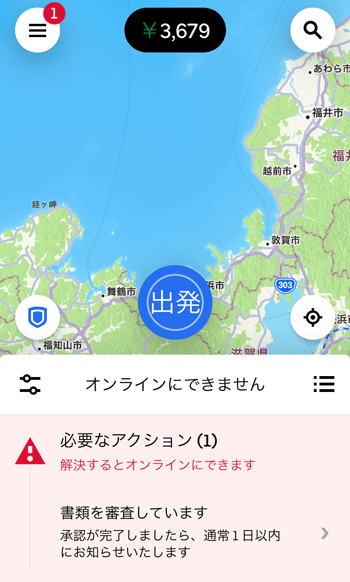
ホーム画面に戻ると同様のメッセージが表示されています。
![Uber Driverの書類の審査中の画面](https://koishiken.com/wp-content/uploads/2023/07/uberdriver-document-review-screen.png)
数分後、メッセージが変わりました。
![Uber Driverの車両の追加の通知画面](https://koishiken.com/wp-content/uploads/2023/07/uberdriver-vehicle-additional-notification-screen.png)
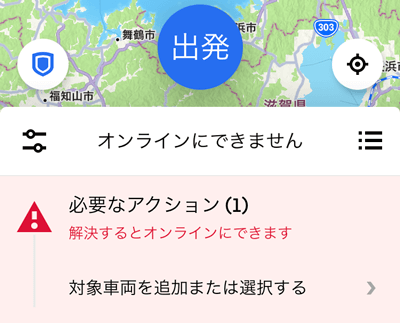
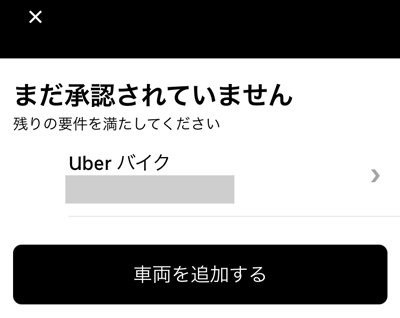
「対象車両を追加または選択する」とのことですが、これは無視してかまいません。
というのも、このメッセージをタップしてもそこから画面が進まないからです。
![Uber Driverの車両の追加の画面](https://koishiken.com/wp-content/uploads/2023/07/uberdriver-vehicle-additional-screen.png)
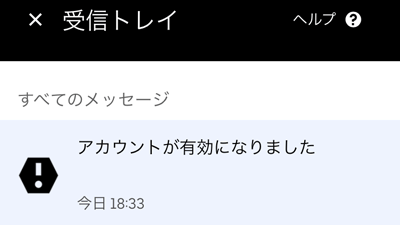
少しすると「アカウントが有効になりました」の通知が届きました。
![Uber Driverのアカウント有効の通知](https://koishiken.com/wp-content/uploads/2023/07/uberdriver-account-activation-notification.png)
受信トレイを開くと同様のメッセージが届いていました。
![Uber Driverのアカウント有効のメッセージ](https://koishiken.com/wp-content/uploads/2023/07/uberdriver-account-valid-message.png)
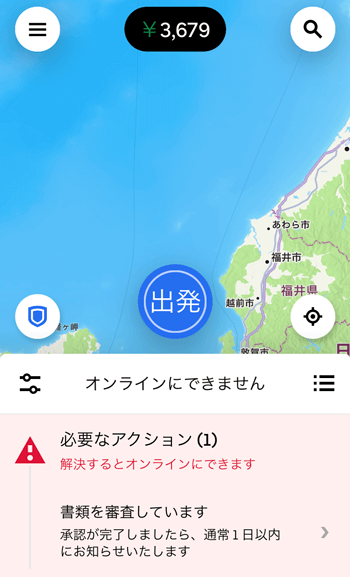
ホーム画面に戻り「書類を審査しています」のメッセージをタップします。
![Uber Driverの書類の審査中の画面](https://koishiken.com/wp-content/uploads/2023/07/uberdriver-document-review-screen-edited-3.png)
自賠責保険証明書とナンバープレートの写真が「完了」となっています。
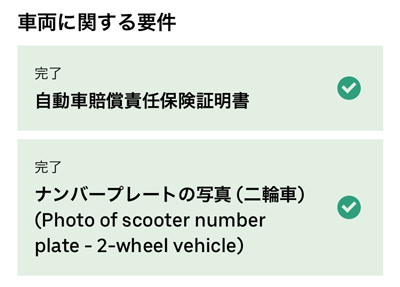
![Uber Driverで自賠責保険証明書が承認された](https://koishiken.com/wp-content/uploads/2023/07/uberdriver-jibaiseki-certificate-approval.png)
![](https://koishiken.com/wp-content/uploads/2022/07/koishiken-150x150.jpg)
無事承認されました。
ホーム画面のメッセージの表示は変わりませんが「出発」をタップします。
![Uber Driverの出発ボタン](https://koishiken.com/wp-content/uploads/2023/07/uberdriver-departure-button.png)
オンラインにすることができました。
![Uber Driverのオンライン画面](https://koishiken.com/wp-content/uploads/2023/07/uberdriver-online-screen.png)
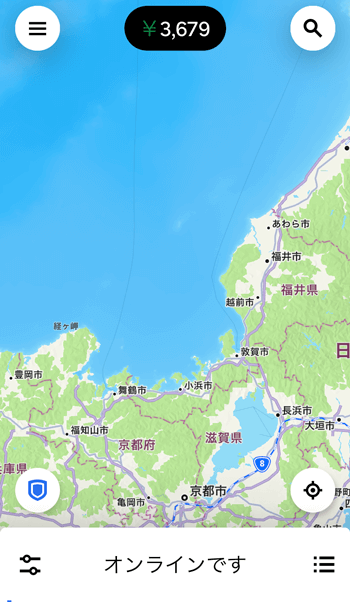
これで以前のとおり配達のリクエストを受けることができるようになります。
私の場合、運が良かったのか自賠責保険証明書の送信からここまで1時間ほどしかかかっていません。
ともかく以上の手順を踏めば書類の更新はできるはずです。
【PR】配達パートナーの登録はこちらから
コメント
コメント一覧 (2件)
書類審査で難航していた為助かりました!
正月でサポート返事来ないし、2日に書類期限切れるし、更新最速のメールは毎日来るし、早めにしようとしても未来に日付で返ってくるし、「2枚一緒に送る」これで解決しました!写真撮る前の説明の画像が1枚の画像なので修正して欲しいですね…
ありがとうございます!
コメントありがとうございます。
こちらからの問い合わせもあるのに、いつまでも修正されないのは釈然としませんね。
ともあれ、解決したようで何よりです。