
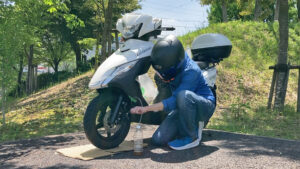
前回、原付二種スクーターのアドレス125(DT11A)のブレーキディスクを交換しました。
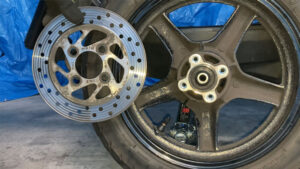
それとともにブレーキパッドも交換しました。
今回はその模様をお伝えします。

小石健と申します。YouTubeチャンネルはこちら。
ブレーキパッドを取り外す
今回の内容はYouTubeに動画もアップしているので、よければこちらもご覧ください。
今回はキャリパのピストンやシールもバラすので、まずハンドルカバーを取り外します。
ハンドルカバーの脱着は下の記事をご参照ください。
マスターシリンダー周りをタオルなどで養生します。
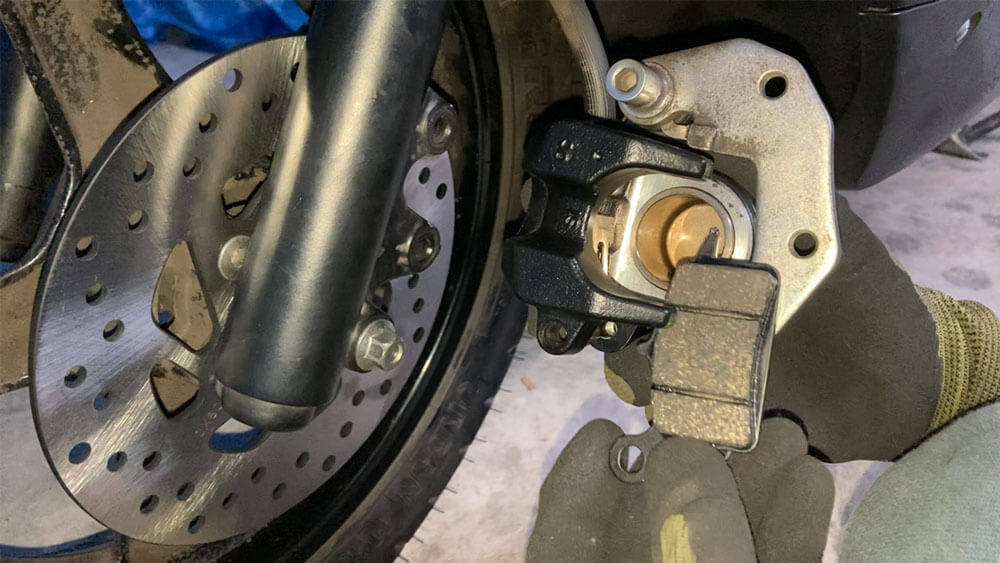
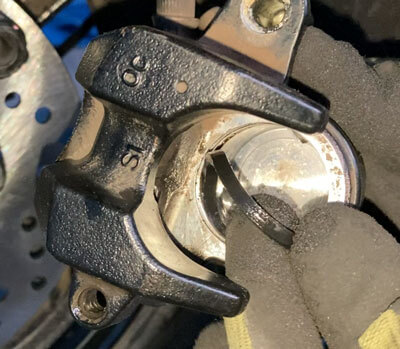
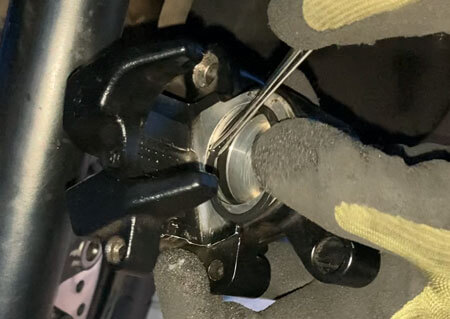
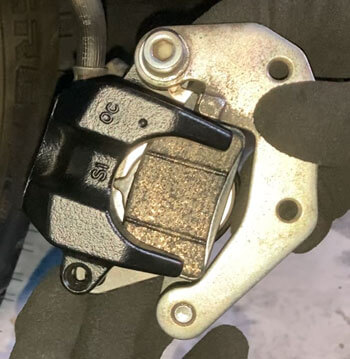
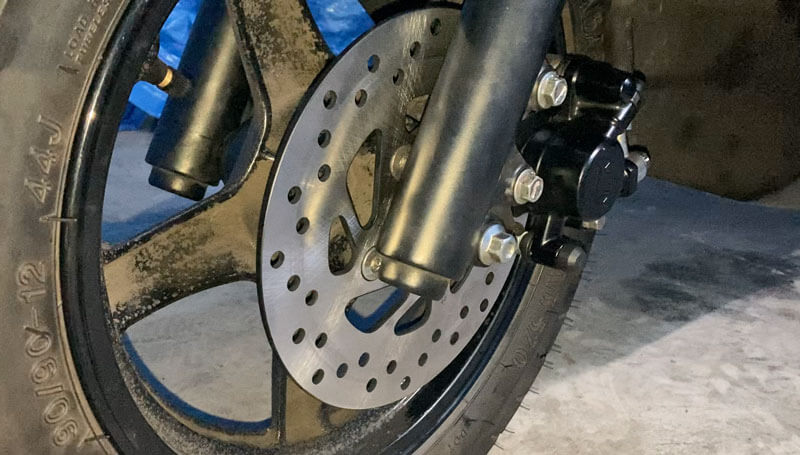
キャリパのブレーキパッドマウンティングピンを外します。
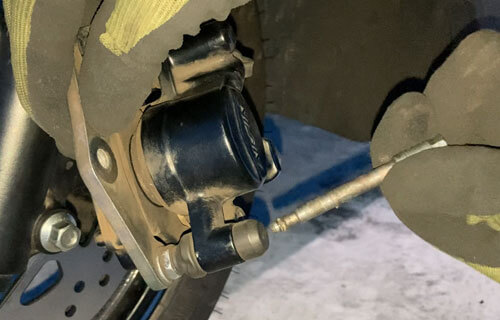
キャリパの以下のパーツを取り外します。
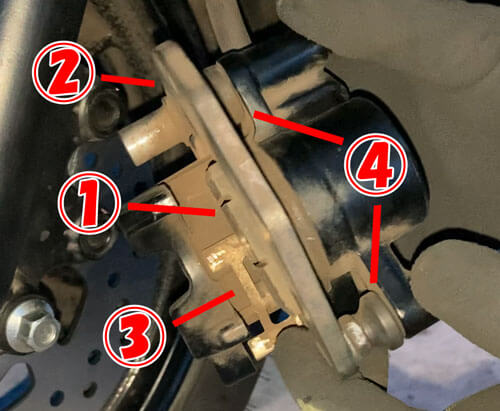
①ブレーキパッド
②ブラケット
③パッドスプリング
④ブーツ
各パーツの接続具合をおぼえておきます。
ピストンとシールを取り外す
ブレーキパッドのみの交換ならここまででいいのですが、私はピストンも取り外します。
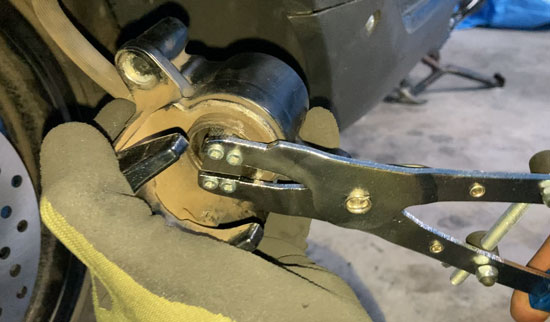
ピストンプライヤーを使ってピストンを引き抜きます。

しかし、私が購入したものはイマイチ使いづらかったので、ブレーキレバーを何度か握ってピストンを押し出して手で外しました。
ところが…
その瞬間ブレーキフルードがあふれ出てこぼれてしまいました。
仕組みがよく分かりませんが、ピストンを取り外す際は養生した方がよさそうです。
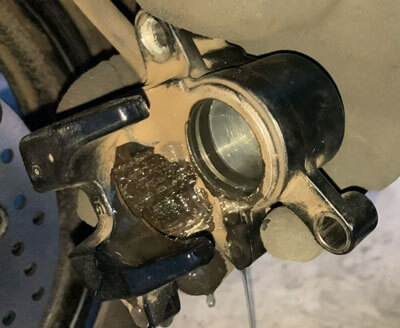
次にダストシールとピストンシールを取り外します。
今回シールは交換するので、外したものは破棄します。
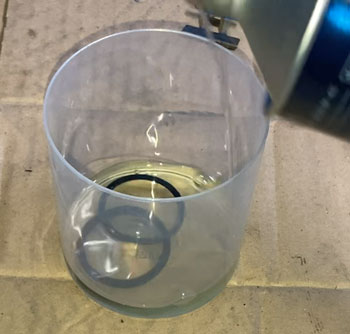
新品のダストシールとピストンシールをブレーキフルードに漬けておきます。

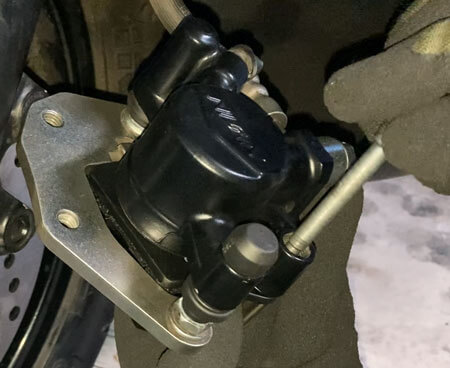
ピストンとシールを取り付ける
外したパーツやボルトなどを掃除します。
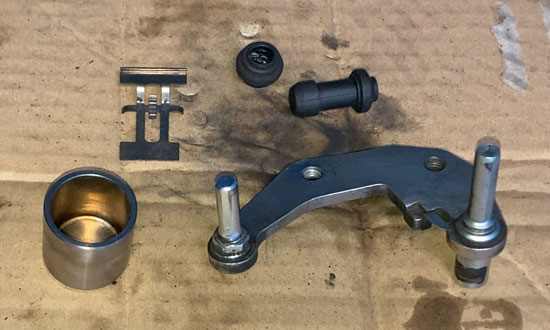
キャリパの内面はブレーキフルードを付けたウェスで清掃します。
ブレーキフルードに漬けておいたダストシールとピストンシールをそのまま取り付けます。
次にピストンをブレーキフルードに浸して挿入します。

パッドスプリングとブーツも取り付けます。
ボルト部分にシリコングリスを塗ったブラケットを取り付けます。
シリコングリスはブレーキパッドグリスとセットのものを購入しました。

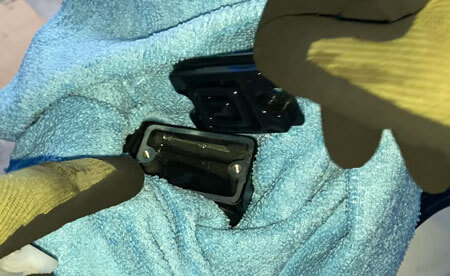
ブレーキパッドを取り付ける
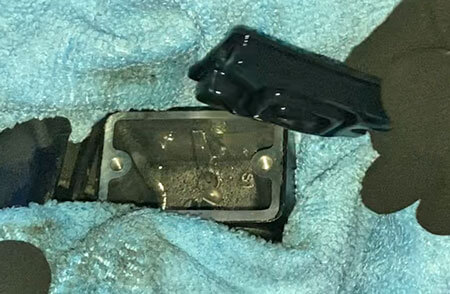
ブレーキパッドはキタコのものを購入しました。

全体の厚さが9mmということで、耐久性があるのではと思いました。
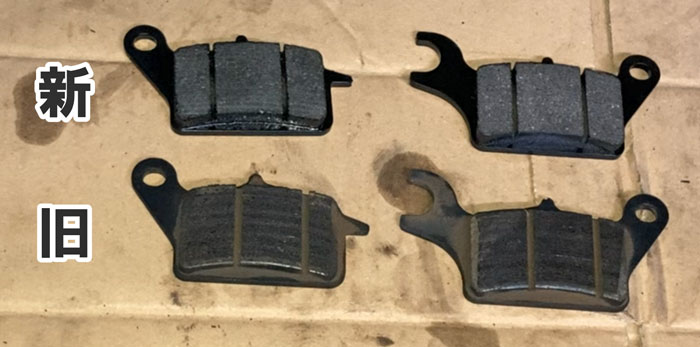
以前はVesrah(ベスラ)というメーカーのもので、バイク用品店で取り付けてもらいましたが、ブレーキの効きは問題ありませんでした。
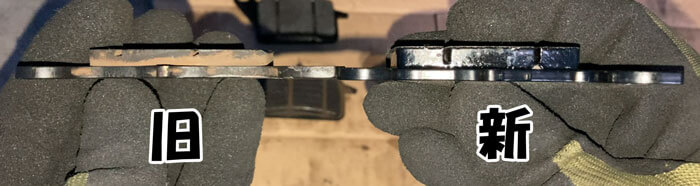
厚さに関してはまだ使えそうですが、ブレーキディスクの変な削り癖が付いていそうなので交換することにします。
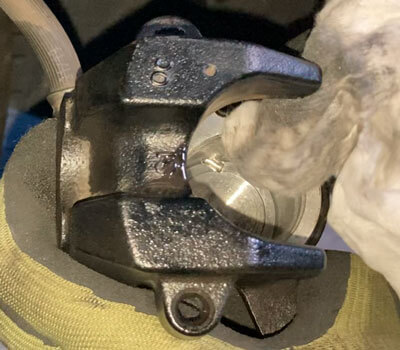
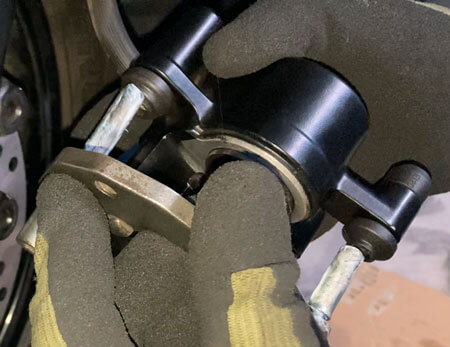
ヤスリでパッドの縁を面取りをしてキャリパに取り付けます。
ツメや穴の位置に注意します。
ブレーキパッドマウンティングピンを挿入して片方のパッドを固定します。
もう片方のパッドを取り付けてピンを貫通させます。
ブレーキディスクはこのパッドの間(下図矢印)に挟みます。

キャリパを取り付けて、ブレーキキャリパマウンティングボルト(12mm)2本を25N・mで締め付けます。
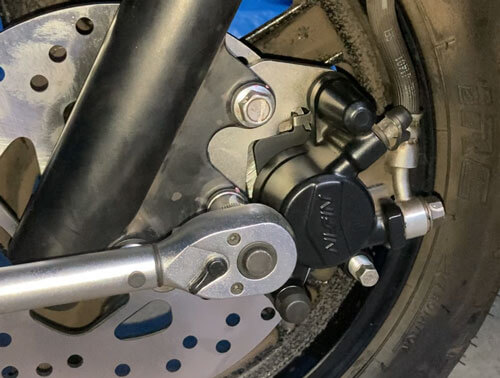
最後にブレーキパッドマウンティングピン(8mm)を17N・m締め付けます。

ブレーキフルードの補充とエア抜き
ブレーキフルードはピストンを引き抜いたときにこぼしてしまったので残量がありません。
なのでブレーキフルードの補充とエア抜きを行いました。
手順は下の記事をご参照ください。
ブレーキパッドを交換するだけならこれらの作業は必要ないかもしれませんが、それほど頻繁にやることでもないのでついでにブレーキフルードも交換した方がいいかもしれません。
すべては自己責任で…
交換完了…だが
前回から続いたブレーキディスクとブレーキパッドの交換は以上で完了です。
ディスクとパッドの擦る音は多少しますが、走行に問題はありません。
しかし、シリコングリスとセットで購入したブレーキパッドグリスを塗るのを忘れていました。
取り付けの際にパッドの背面(ブレーキディスクに当たらない方)に塗るのですが、今のところブレーキ鳴きはありません。
といっても、ブレーキパッドグリスの塗布はサービスマニュアルには記載していないので必須ではないと思います。
たぶん大丈夫…
ディスクやパッドの耐久性も含めた今後の経過は、機会があれば追ってお伝えしたいと思います。
コメント